The Digital Notecard was created to emulate what a standard Landman would use to take notes at the courthouse. Everything you need to enter for a successful flowchart and title run is easily laid out in front of you.
How to Add a Notecard
Select the plus button in the sidebar of the flowchart screen. This automatically opens up the instant entry digital notecard.
OR
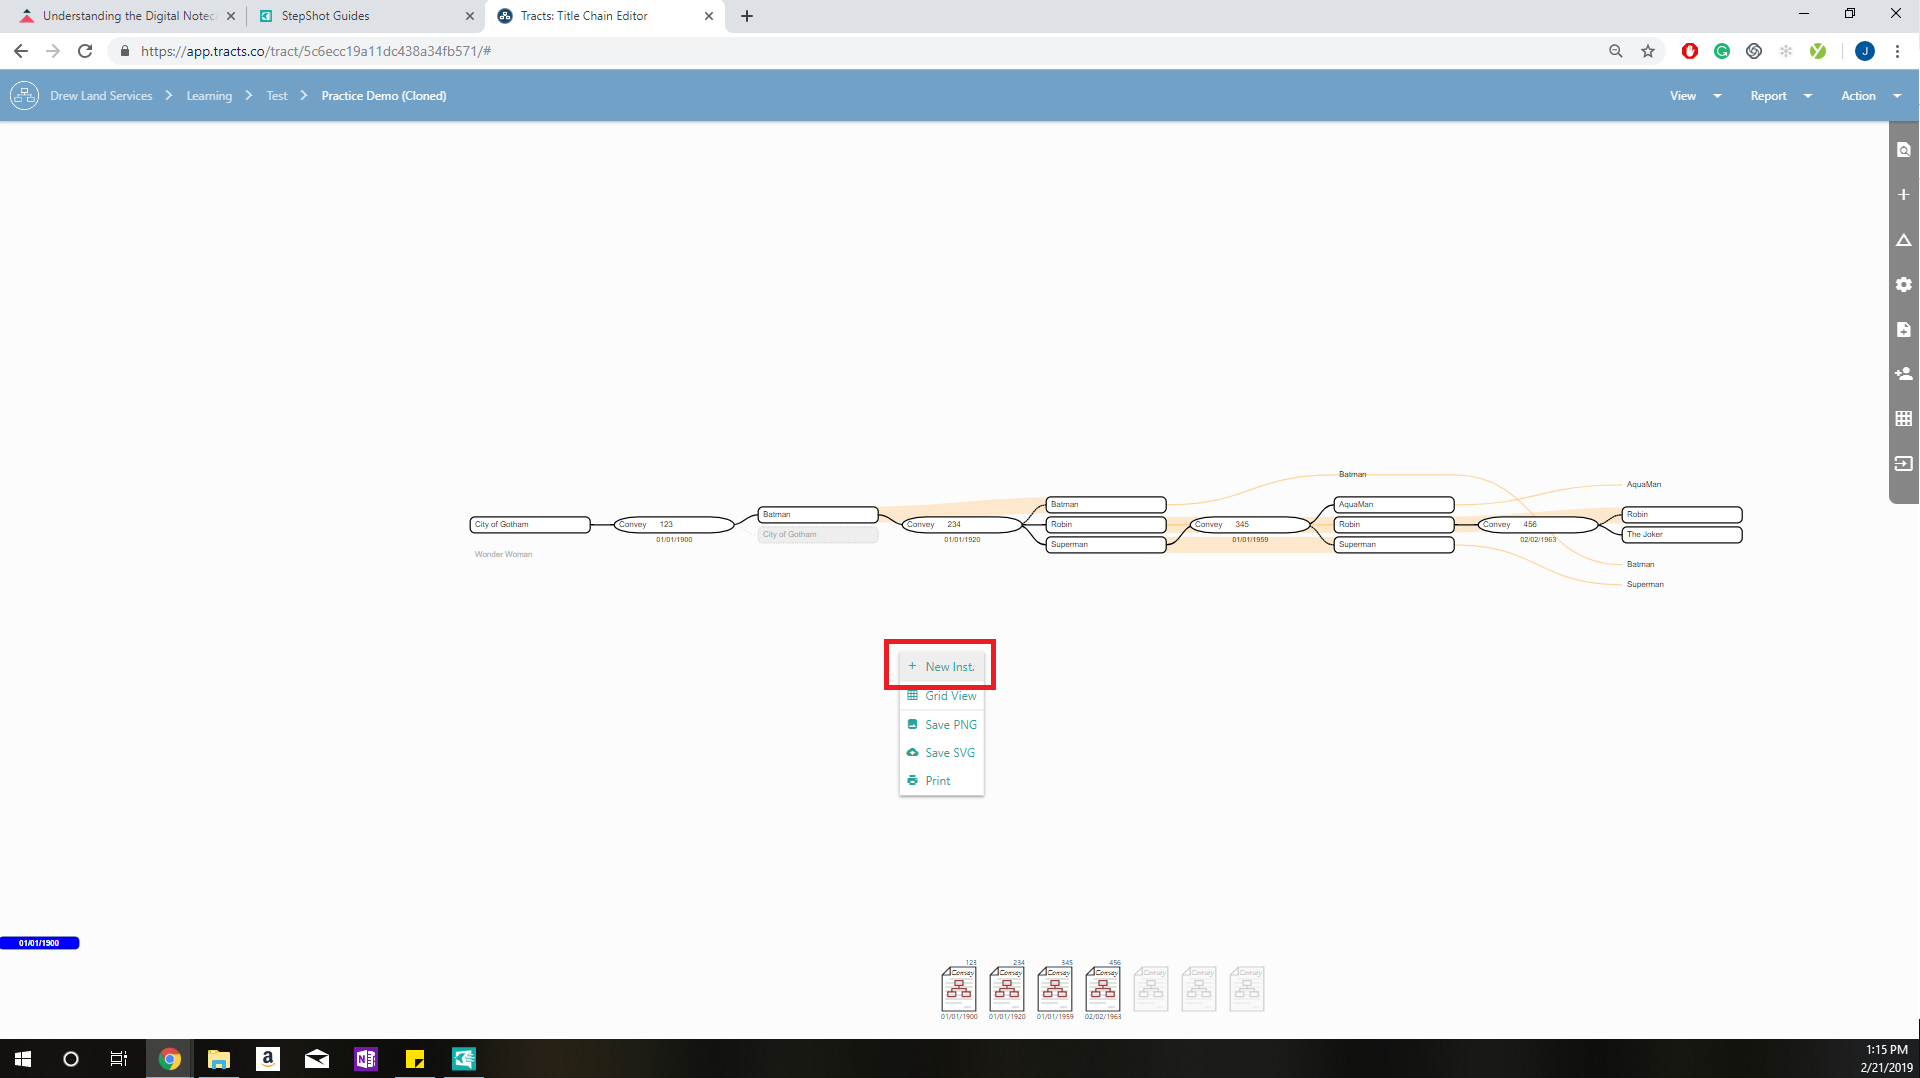
Right-click anywhere on your screen to open up an option to select “+ New Inst.”
Inside the Notecard
Indicate Document Type
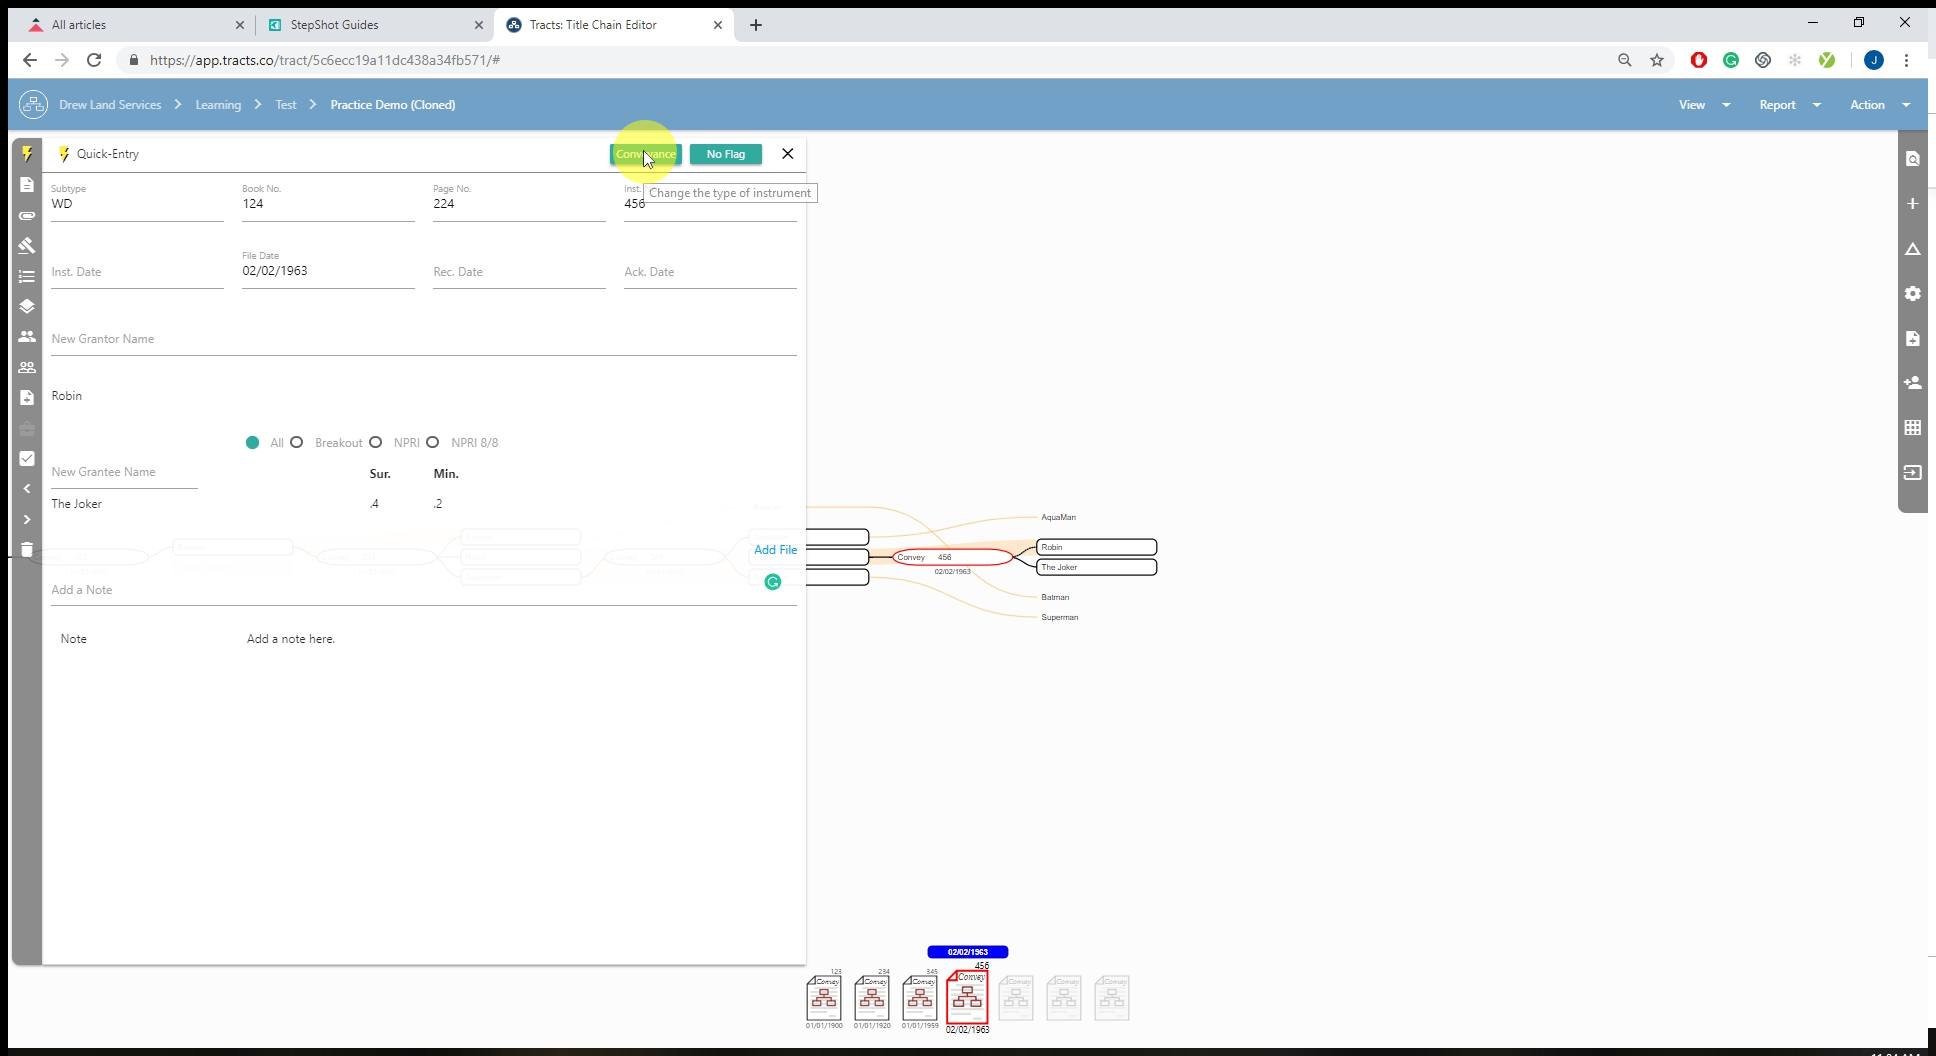
On the top right of the digital notecard, there are two types of click-through labels. The first indicates document type.
These document types will appear in the notecard, flowchart, and runsheet.
Conveyance
Enter the Conveyance information in the spaces prompted. It will appear in the flowchart with a black outline.
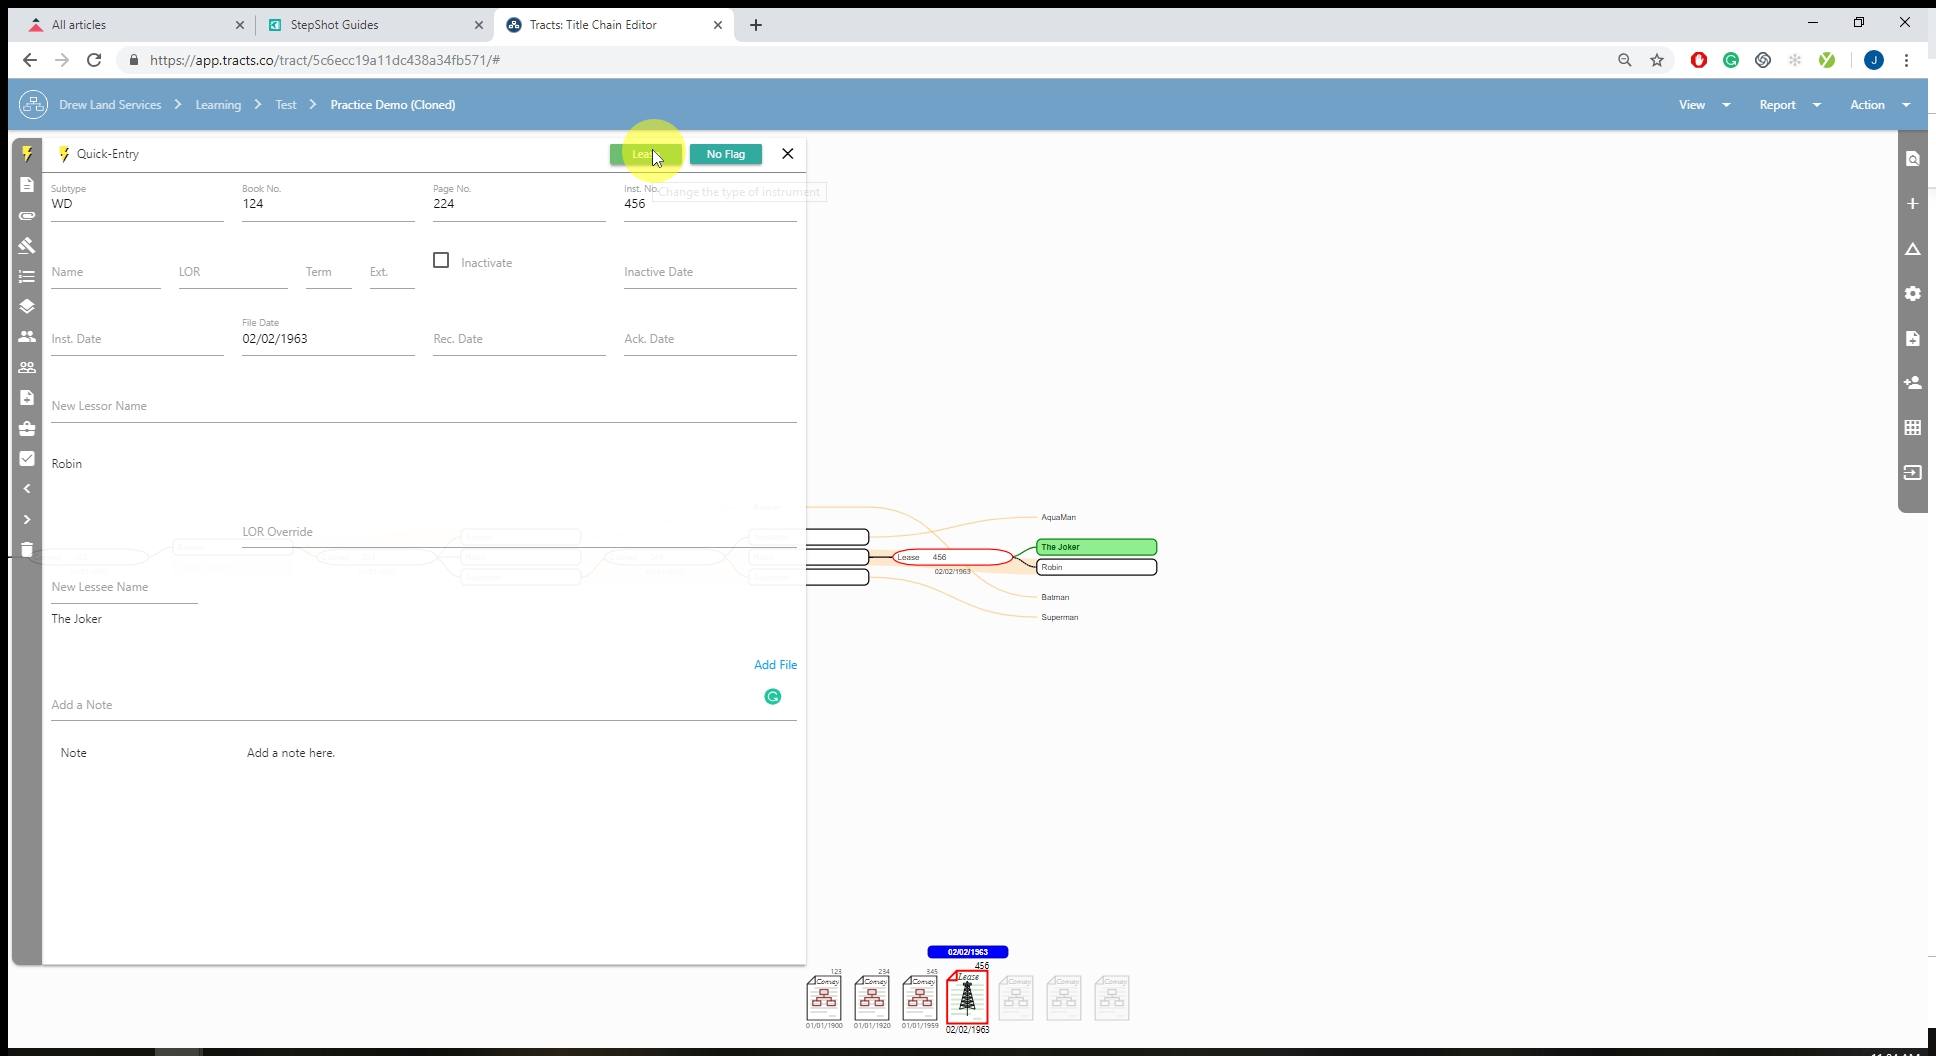
Lease
Enter the Lease information in the spaces prompted. It will appear lime green in the flowchart with an oil rig in the document at the bottom of the screen.
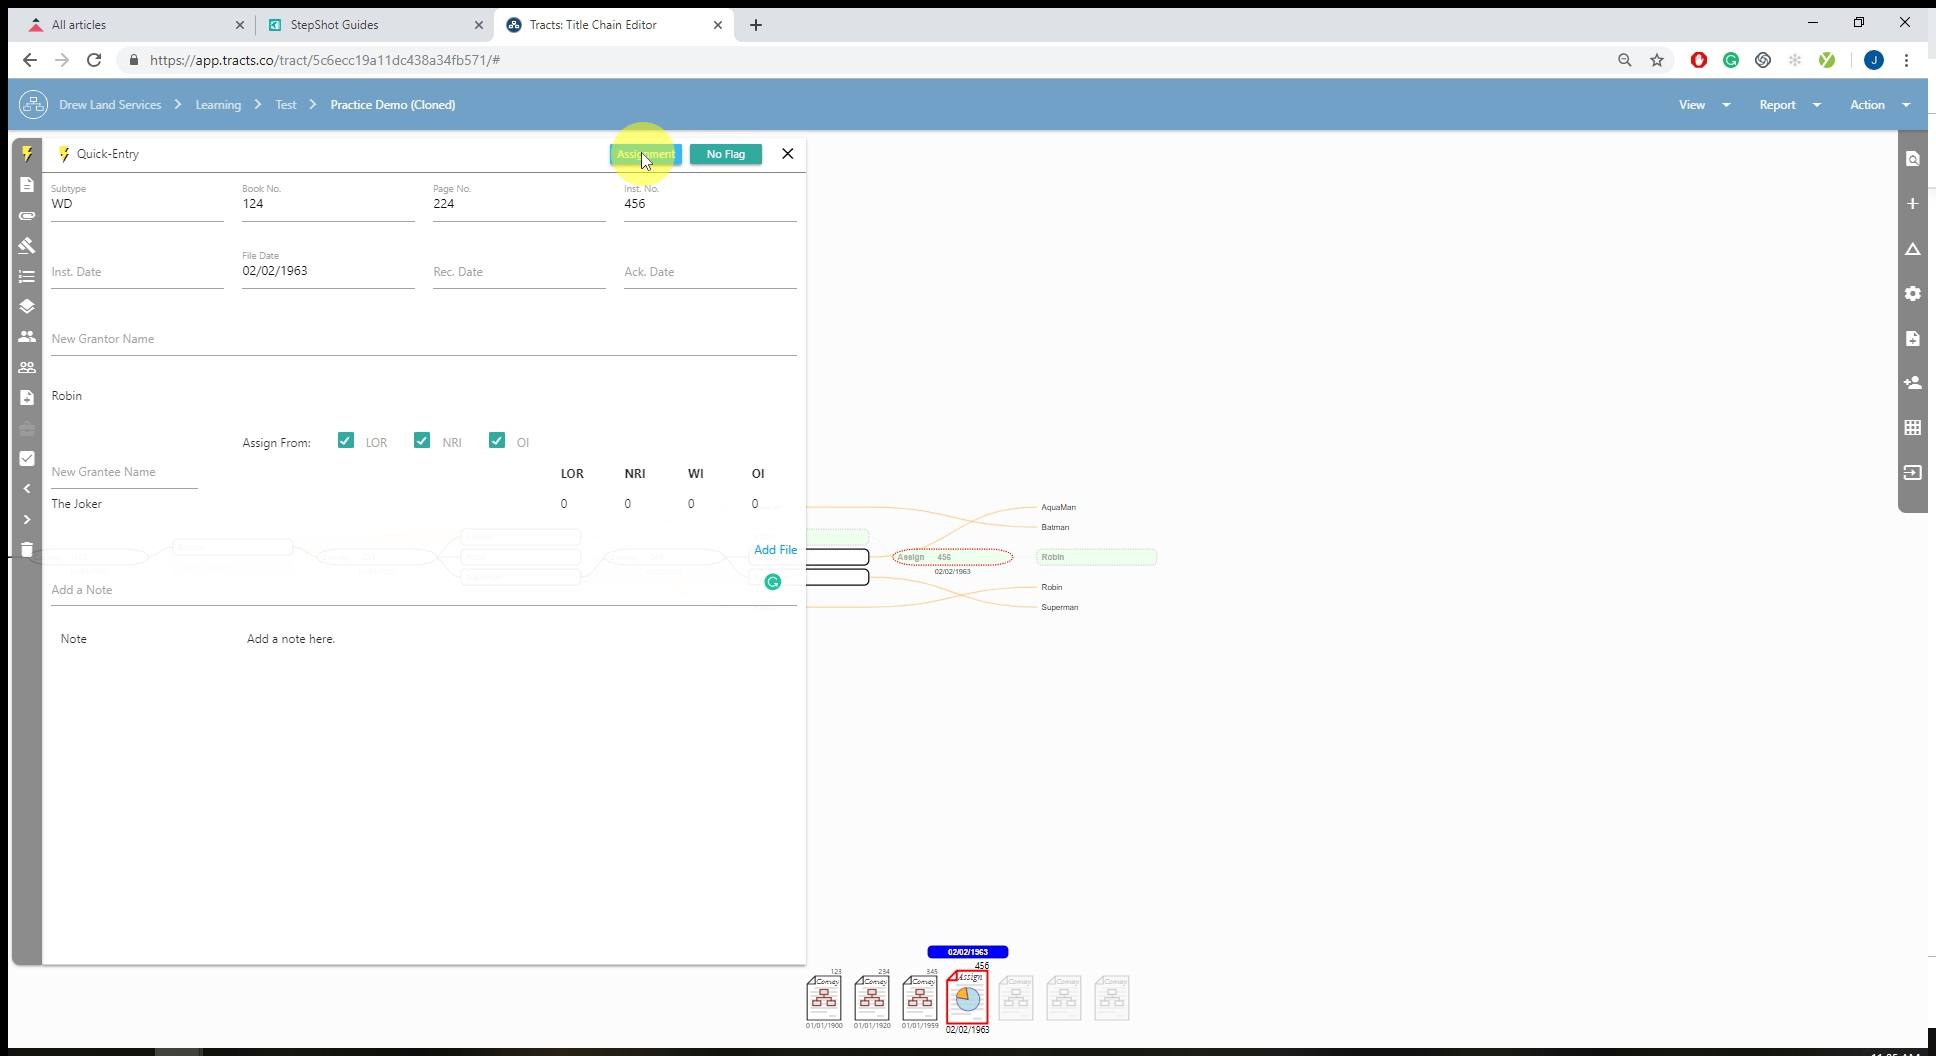
Assignment
Enter the prompted information for the Assignment including the LOR, NRI, WI, and OI. This will appear light green in the flowchart and have a pie chart in the document at the bottom of the screen.
Indicate Any Warnings
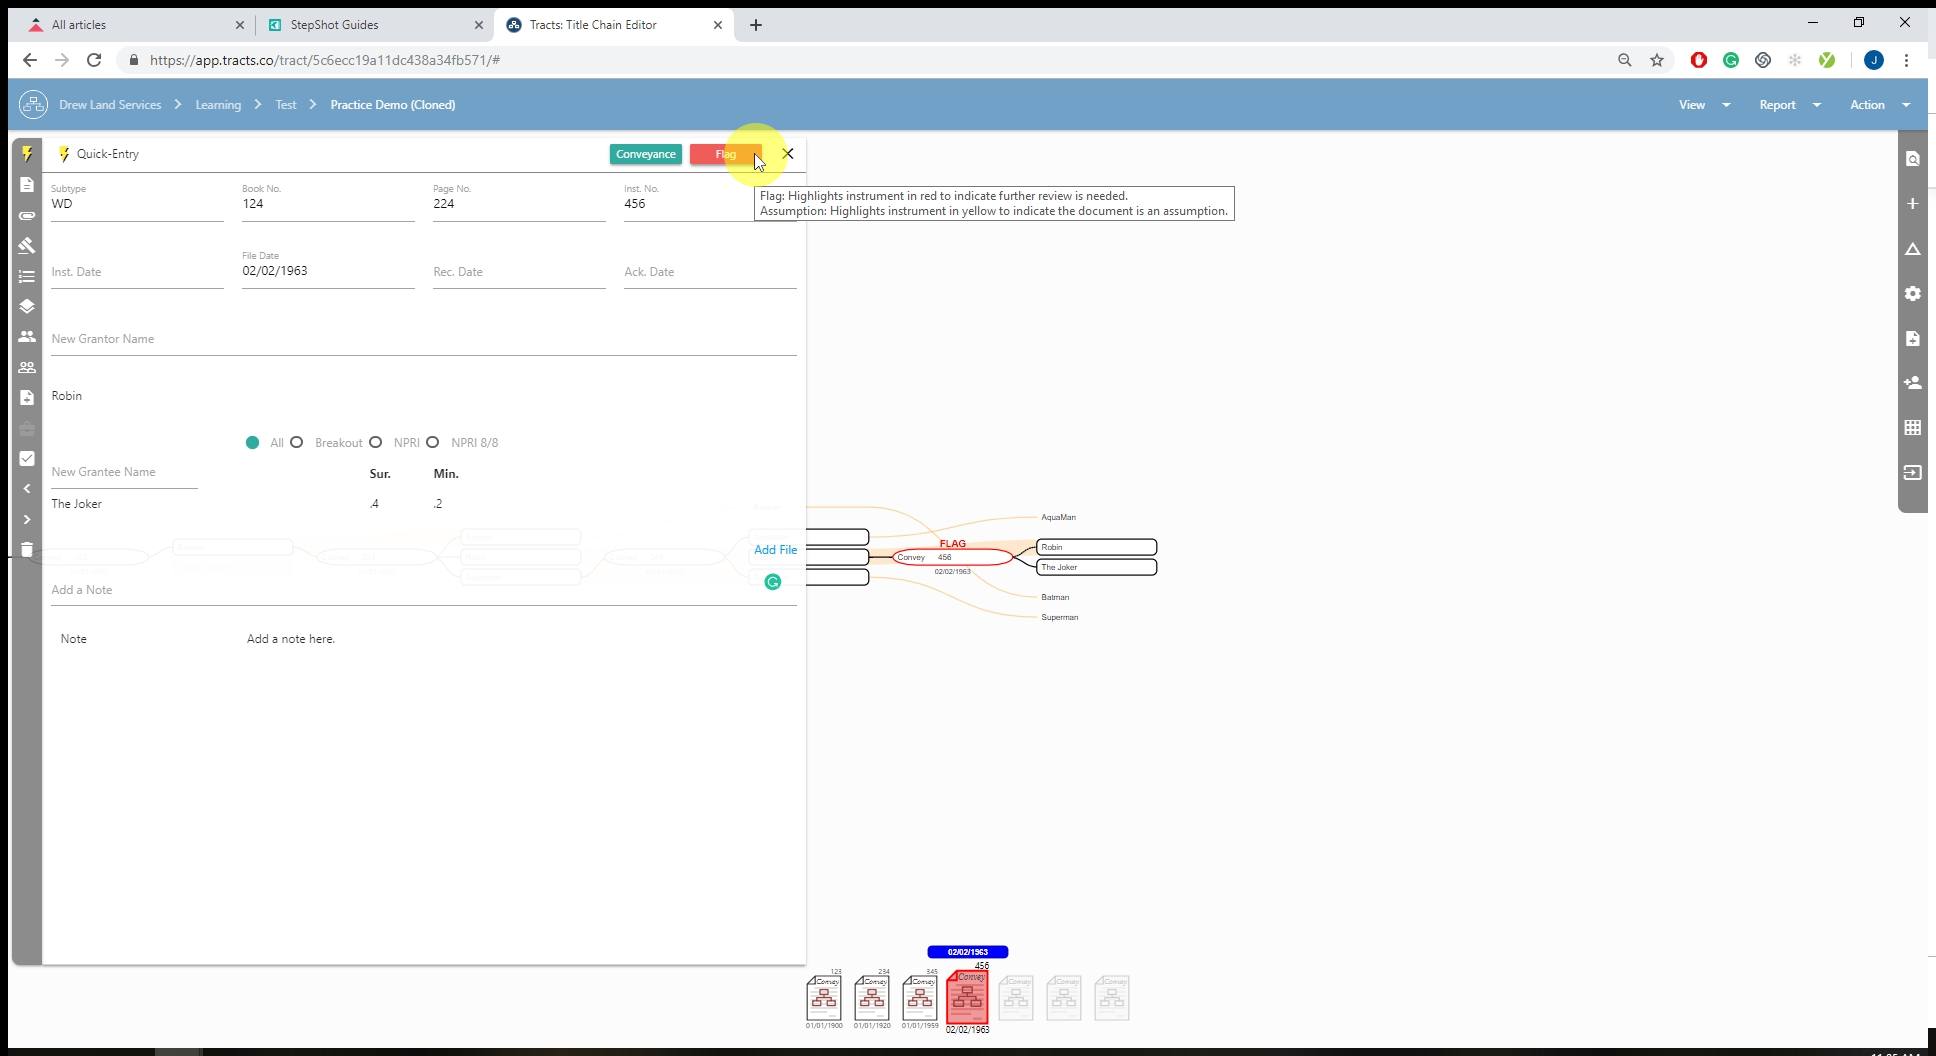
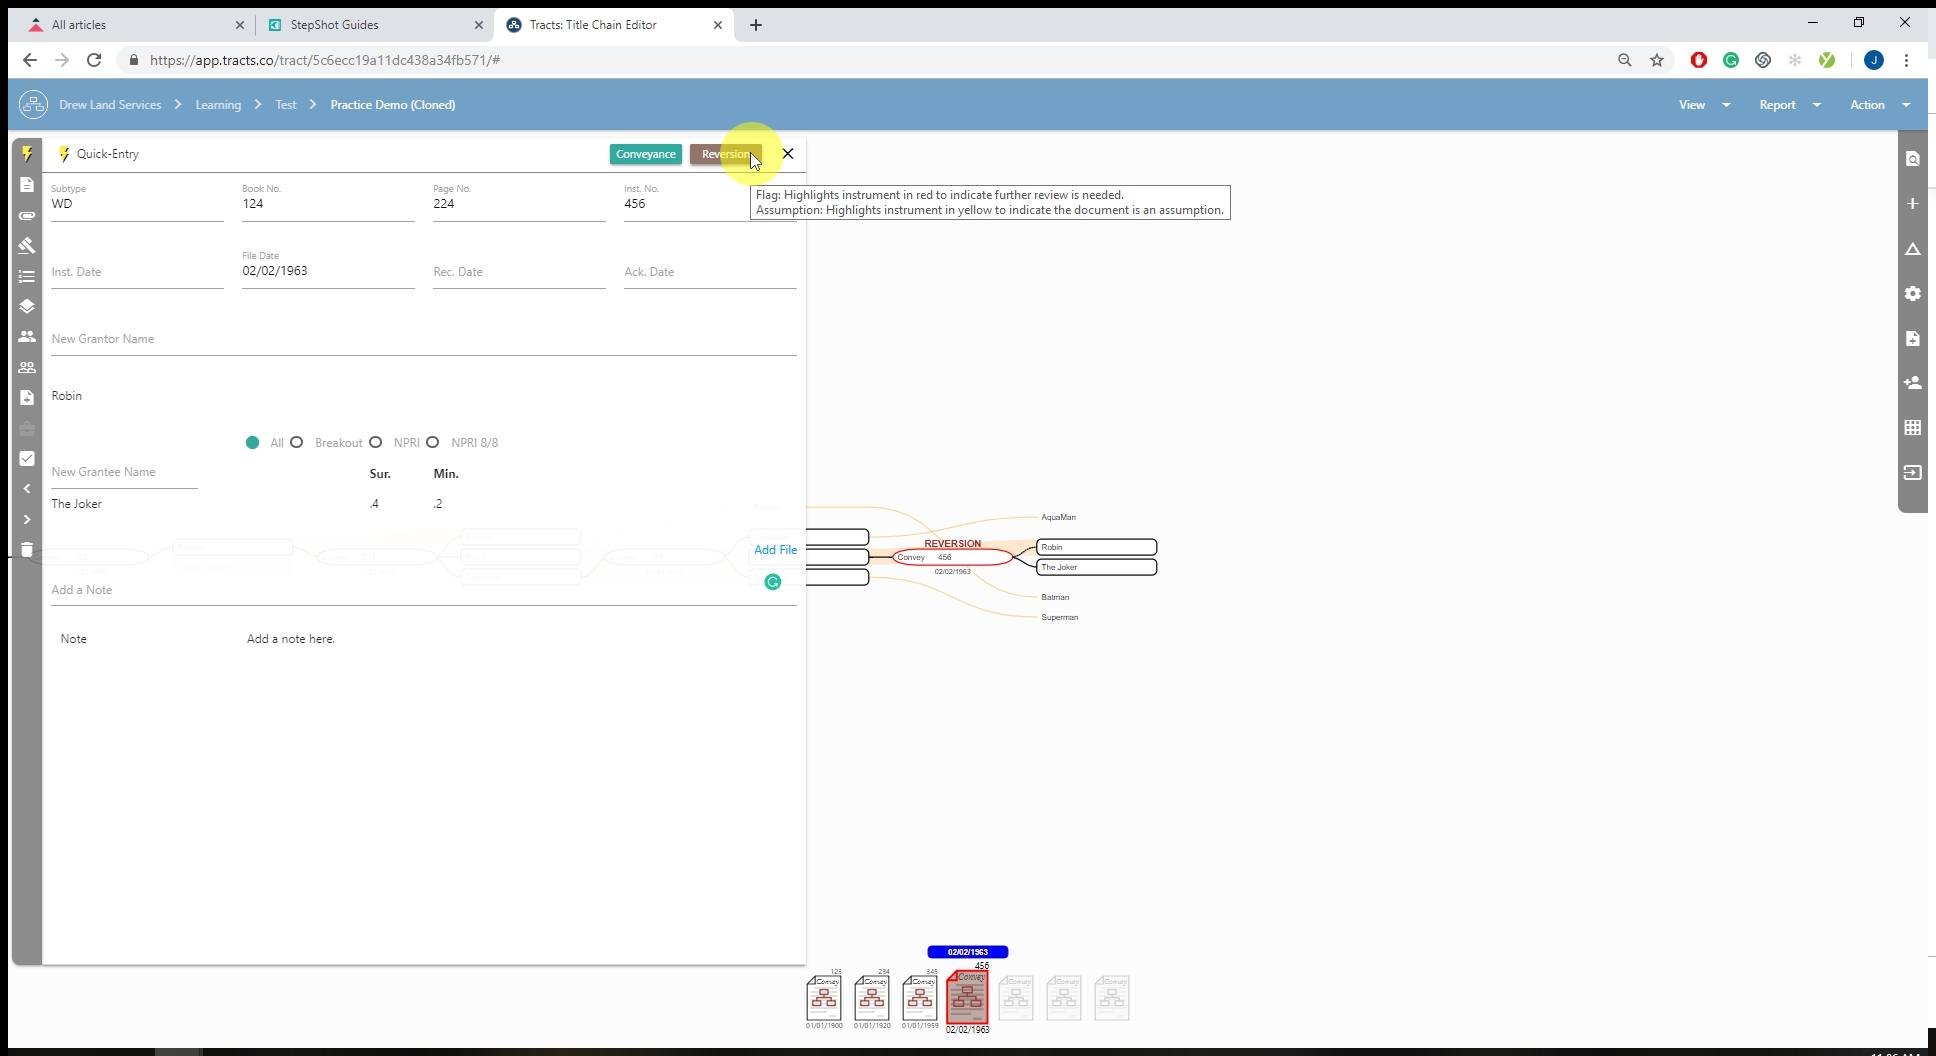
On the top right of the digital notecard, there are two types of click-through labels. The second indicates user flagged warnings.
These warnings will appear in the notecard, flowchart, and runsheet.
No Flag

Flag
Assumption

Reversion
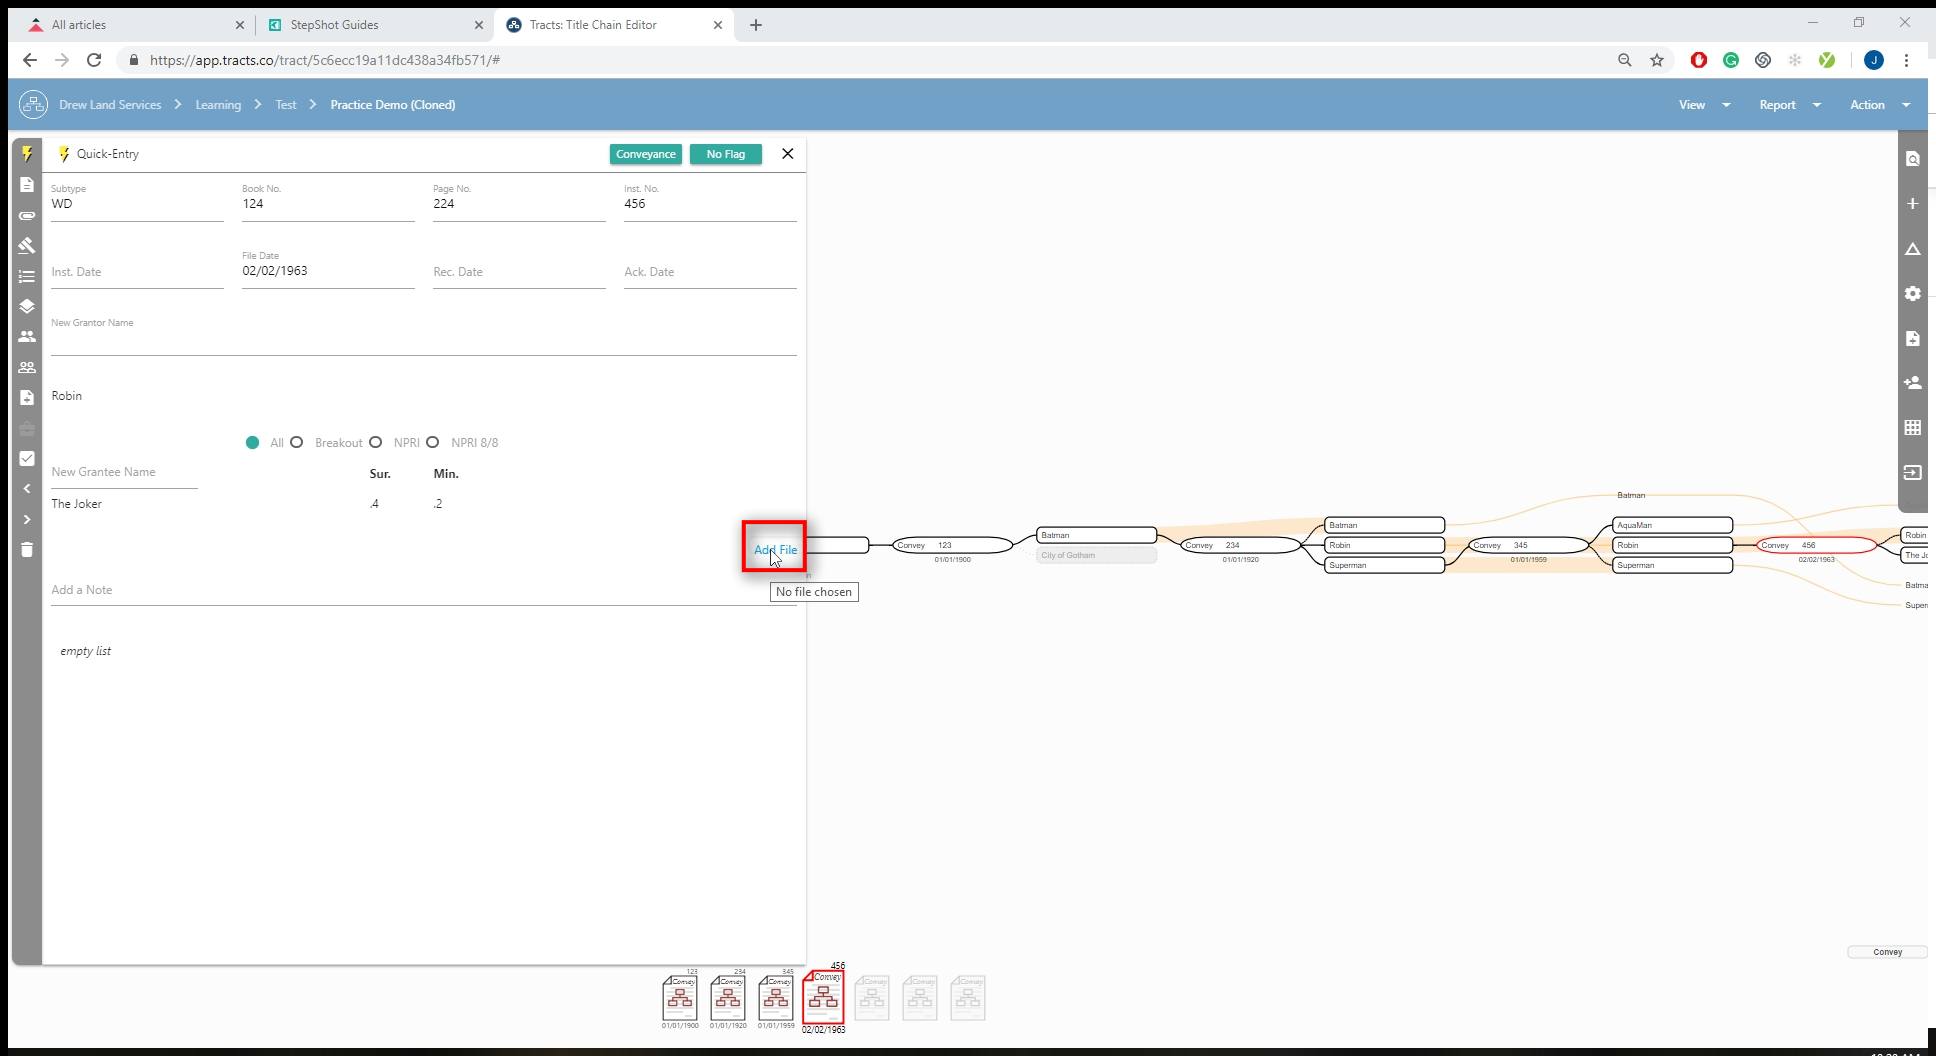
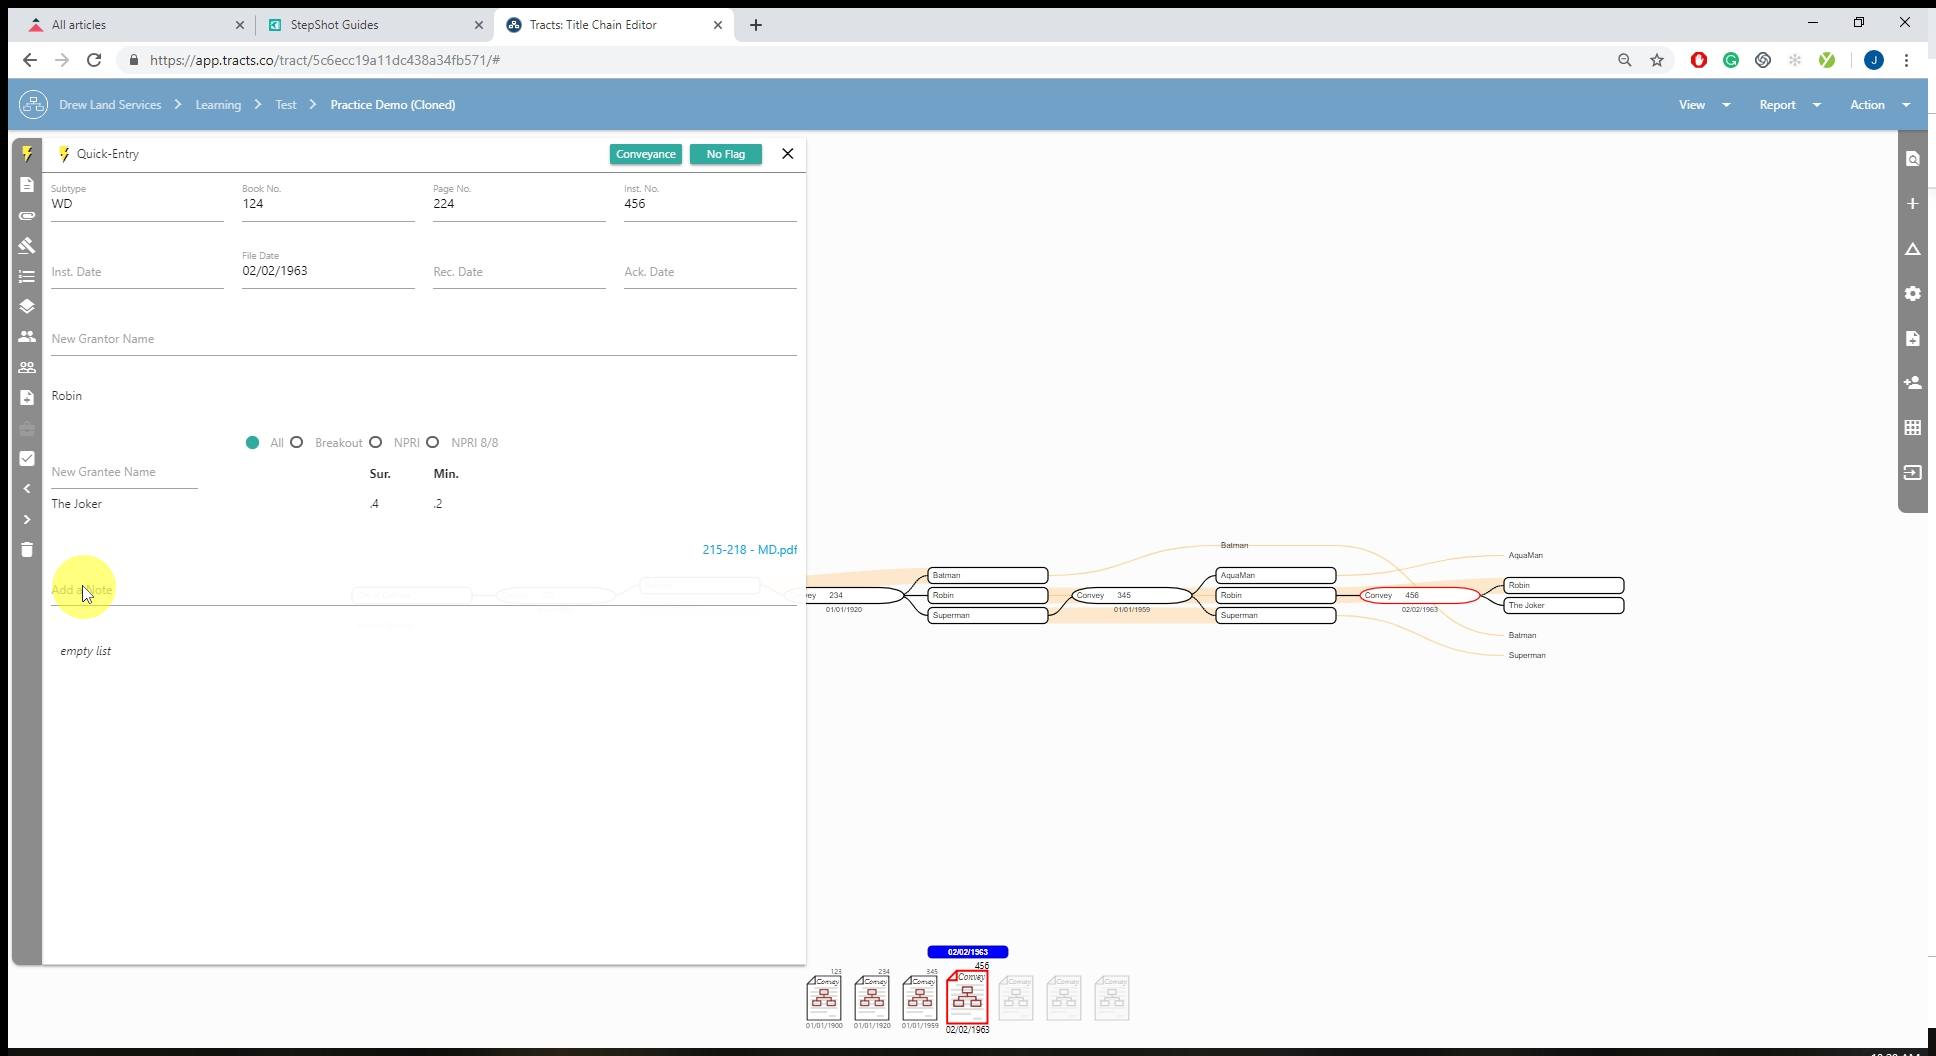
Attach a File
Here you can attach the actual .pdf document into the notecard so that you can view it easily. After added, you can open it by selecting the document and it will open up on the right-hand side of your screen next to the notecard.
Add a Note
When you add a note it is visible to all of those who have access to the AOI. The notes can be deleted by double-clicking the trashcan icon. Notes will appear below the “Add a Note” entry, inside of the runsheet, and in the Notes & Requirements tab.
Digital Notecard Sidebar
This grey sidebar appears on the left-hand side of the digital notecard. Below you can find out each tabs function from top to bottom.
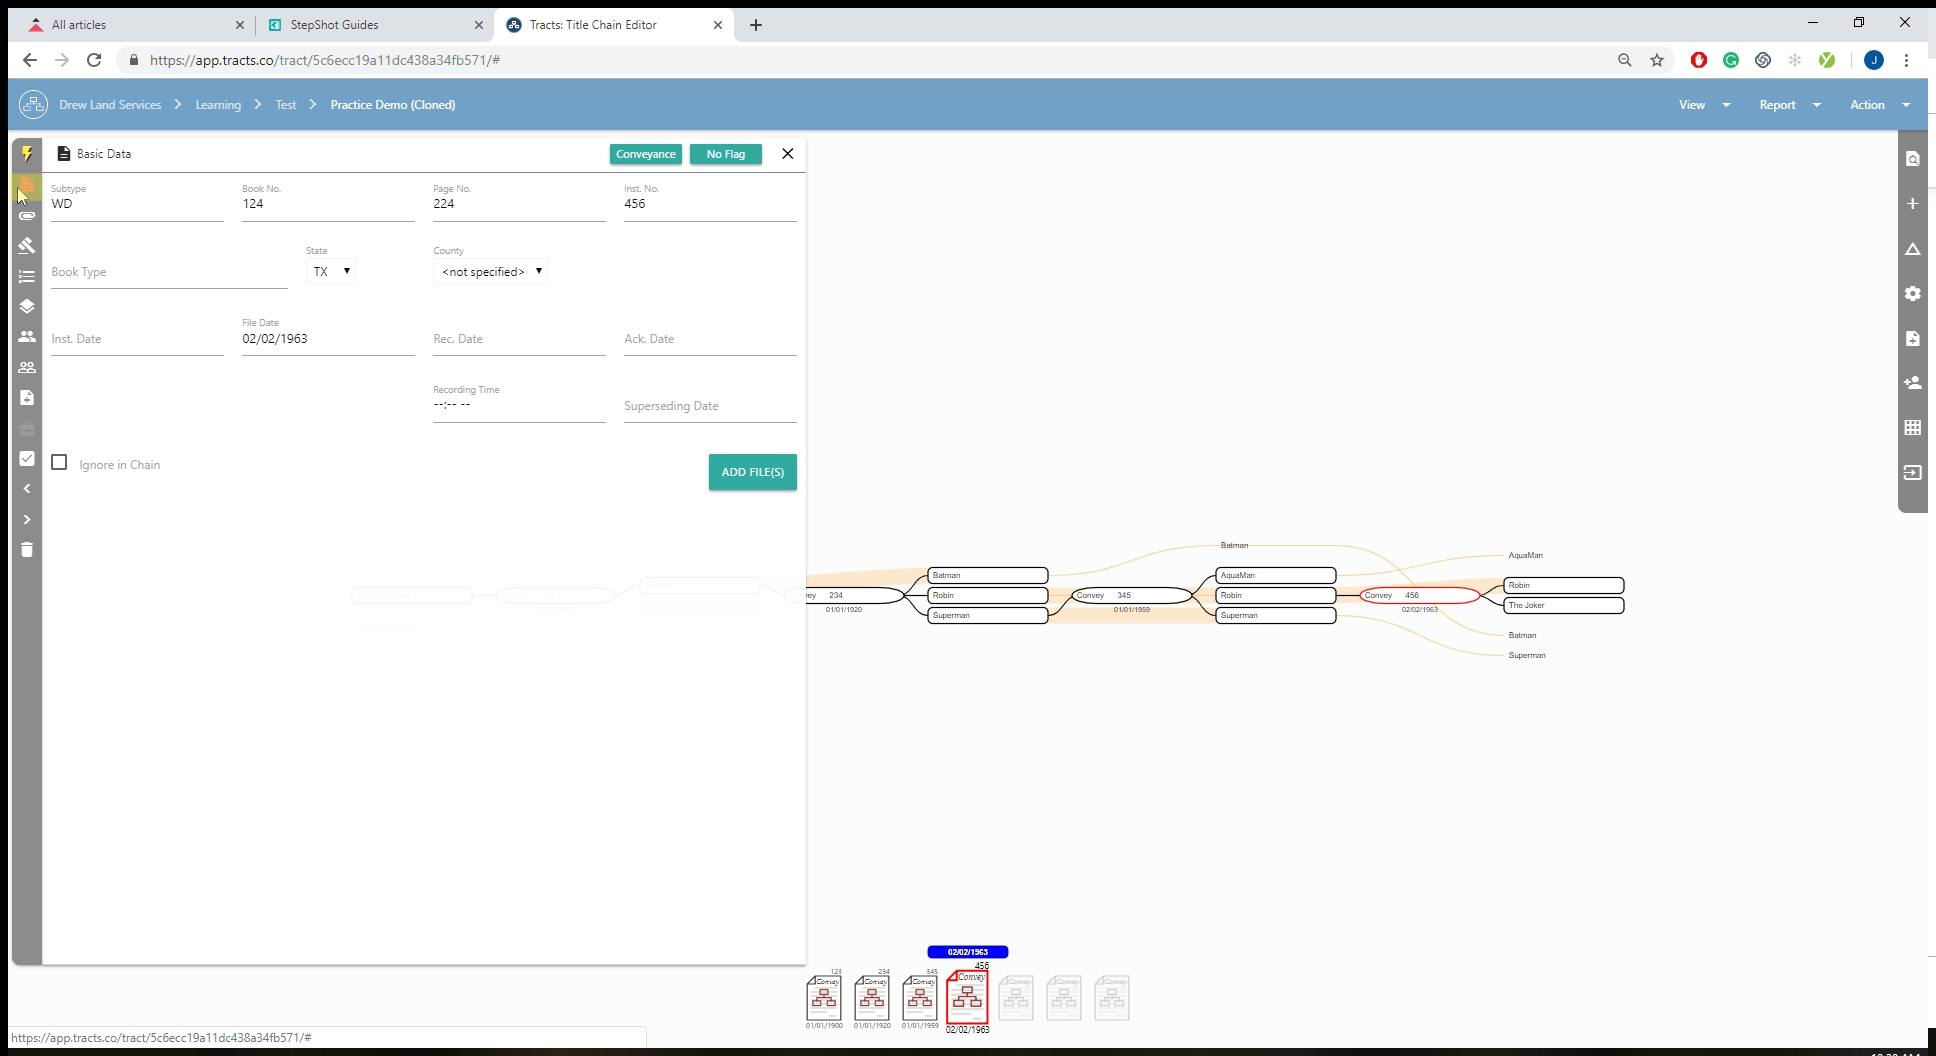
Basic Data
The instrument basic data is shown in this tab. The County and State drop-down lists are automatically assigned when filling out the AOI labels.
There is also an option for a “Superseding Date”. This overrides all other dates for determining instrument order in the chain of title computations relative to other instruments. Use this when you need a transaction to occur at a time other than the date of your instrument. For example, you might have an Affidavit of Heirship that describes a transaction in the chain of title some 50 years prior to the date of the instrument. In that case, you should input the proper instrument dates, and then input the actual date of the transaction in the chain of title in the Superseding Date field.
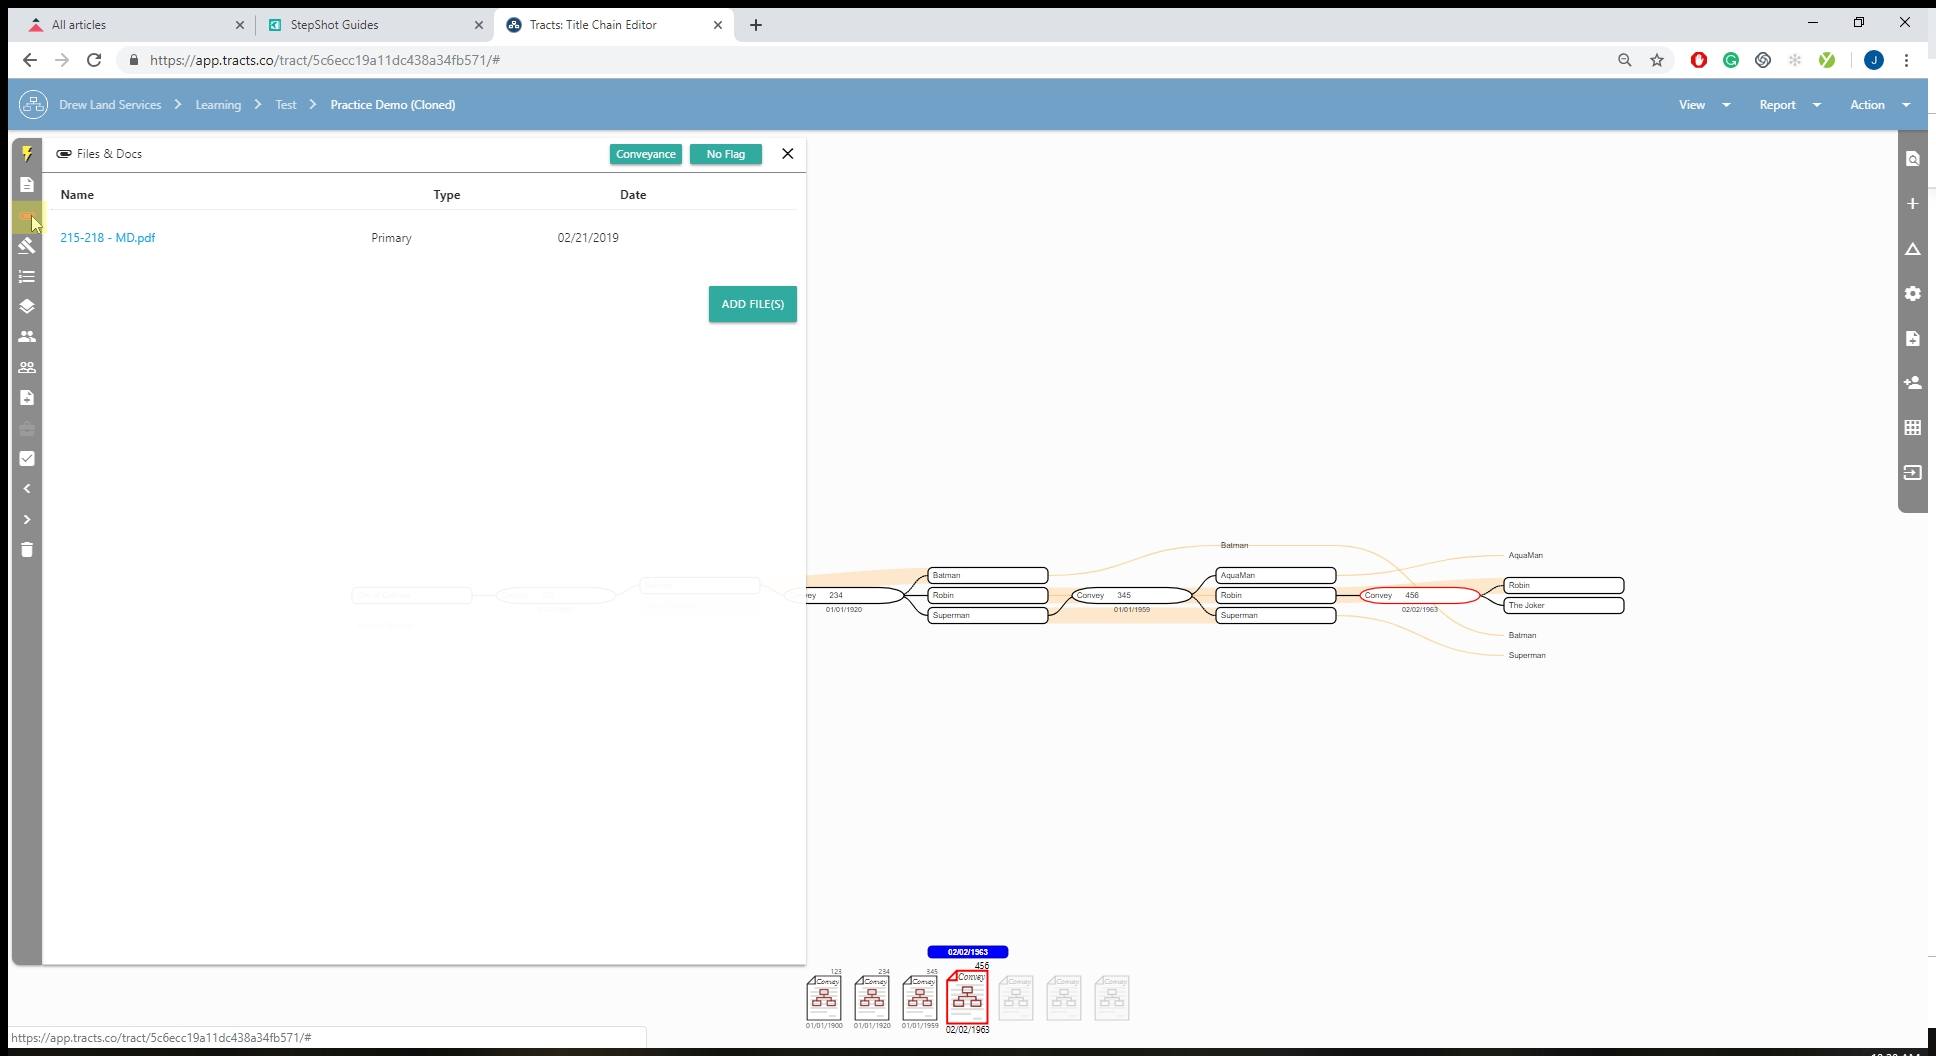
Files & Documents
Here you can attach .pdf documents that directly pertain to the notecard you are working on. These links will also appear in the runsheet.
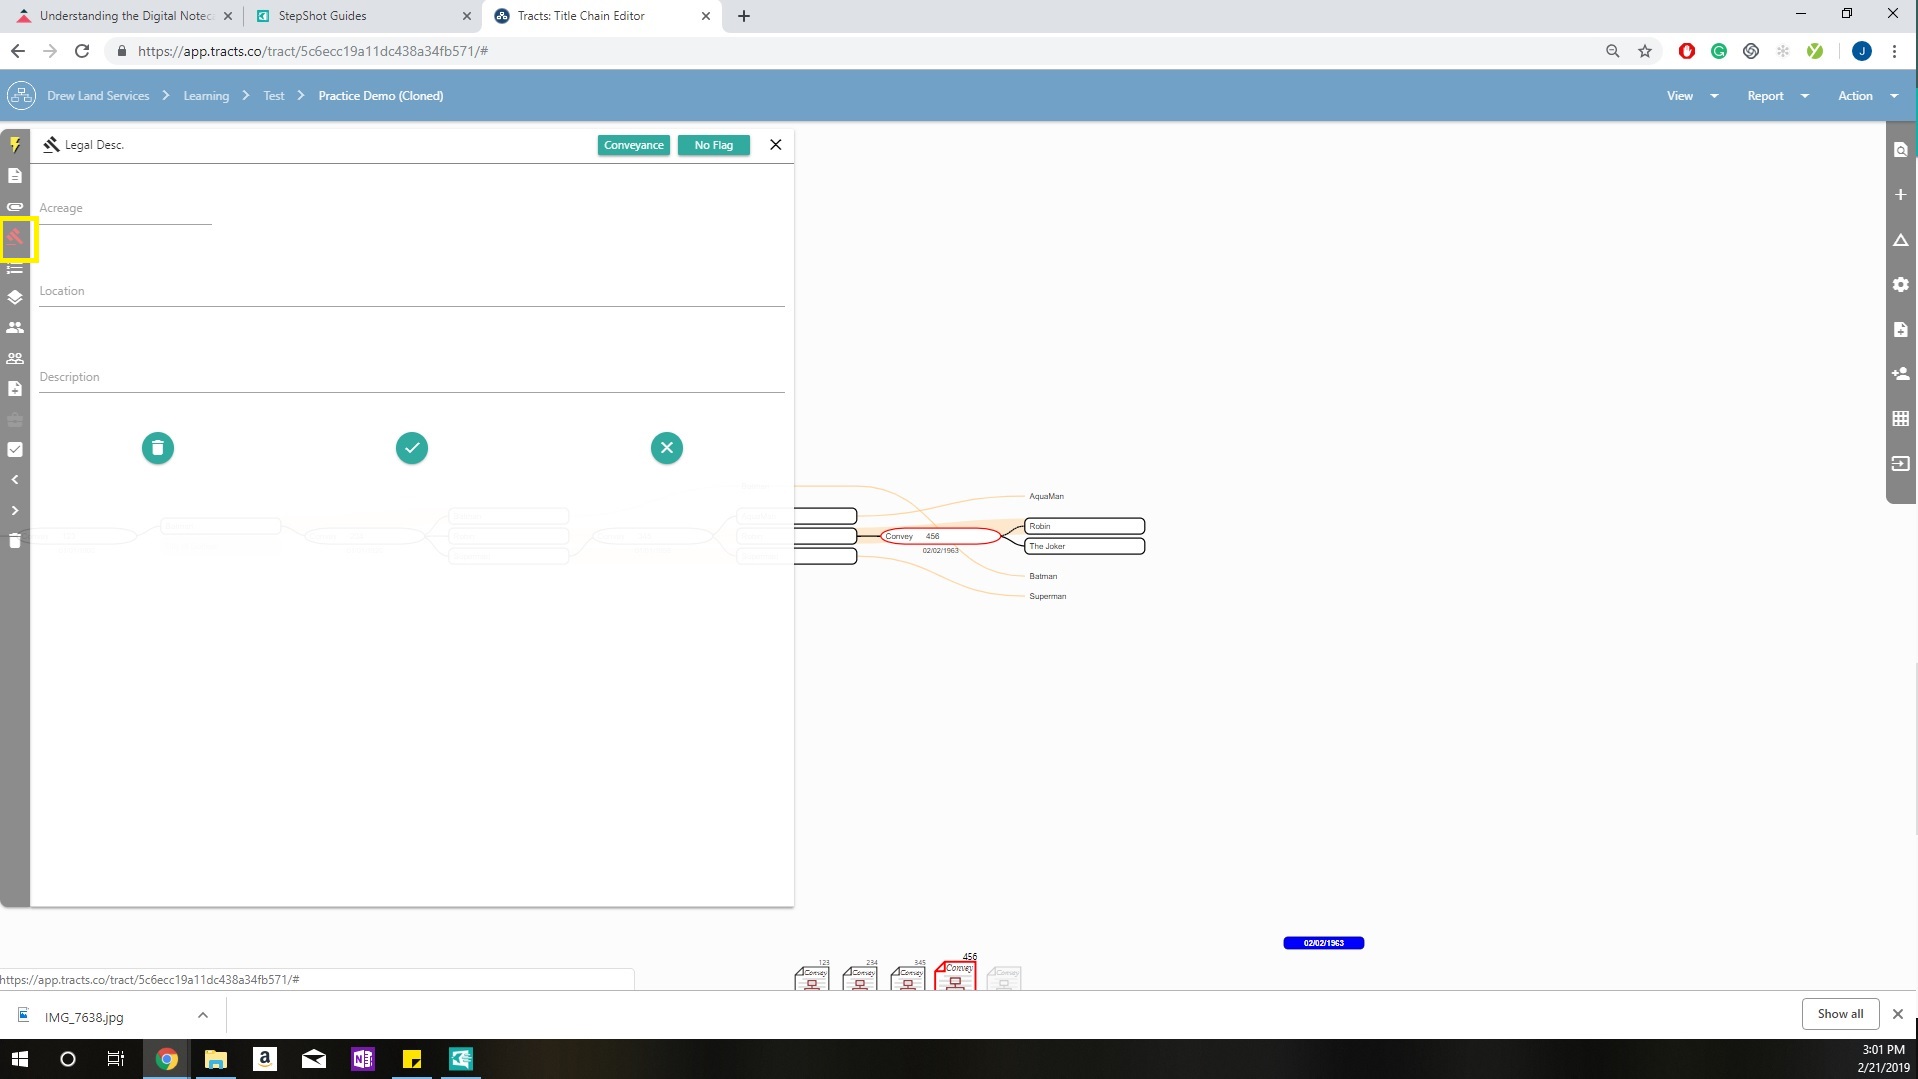
Legal Description
Anything entered into this tab does not affect the flowchart. This is for supplemental informational purposes.
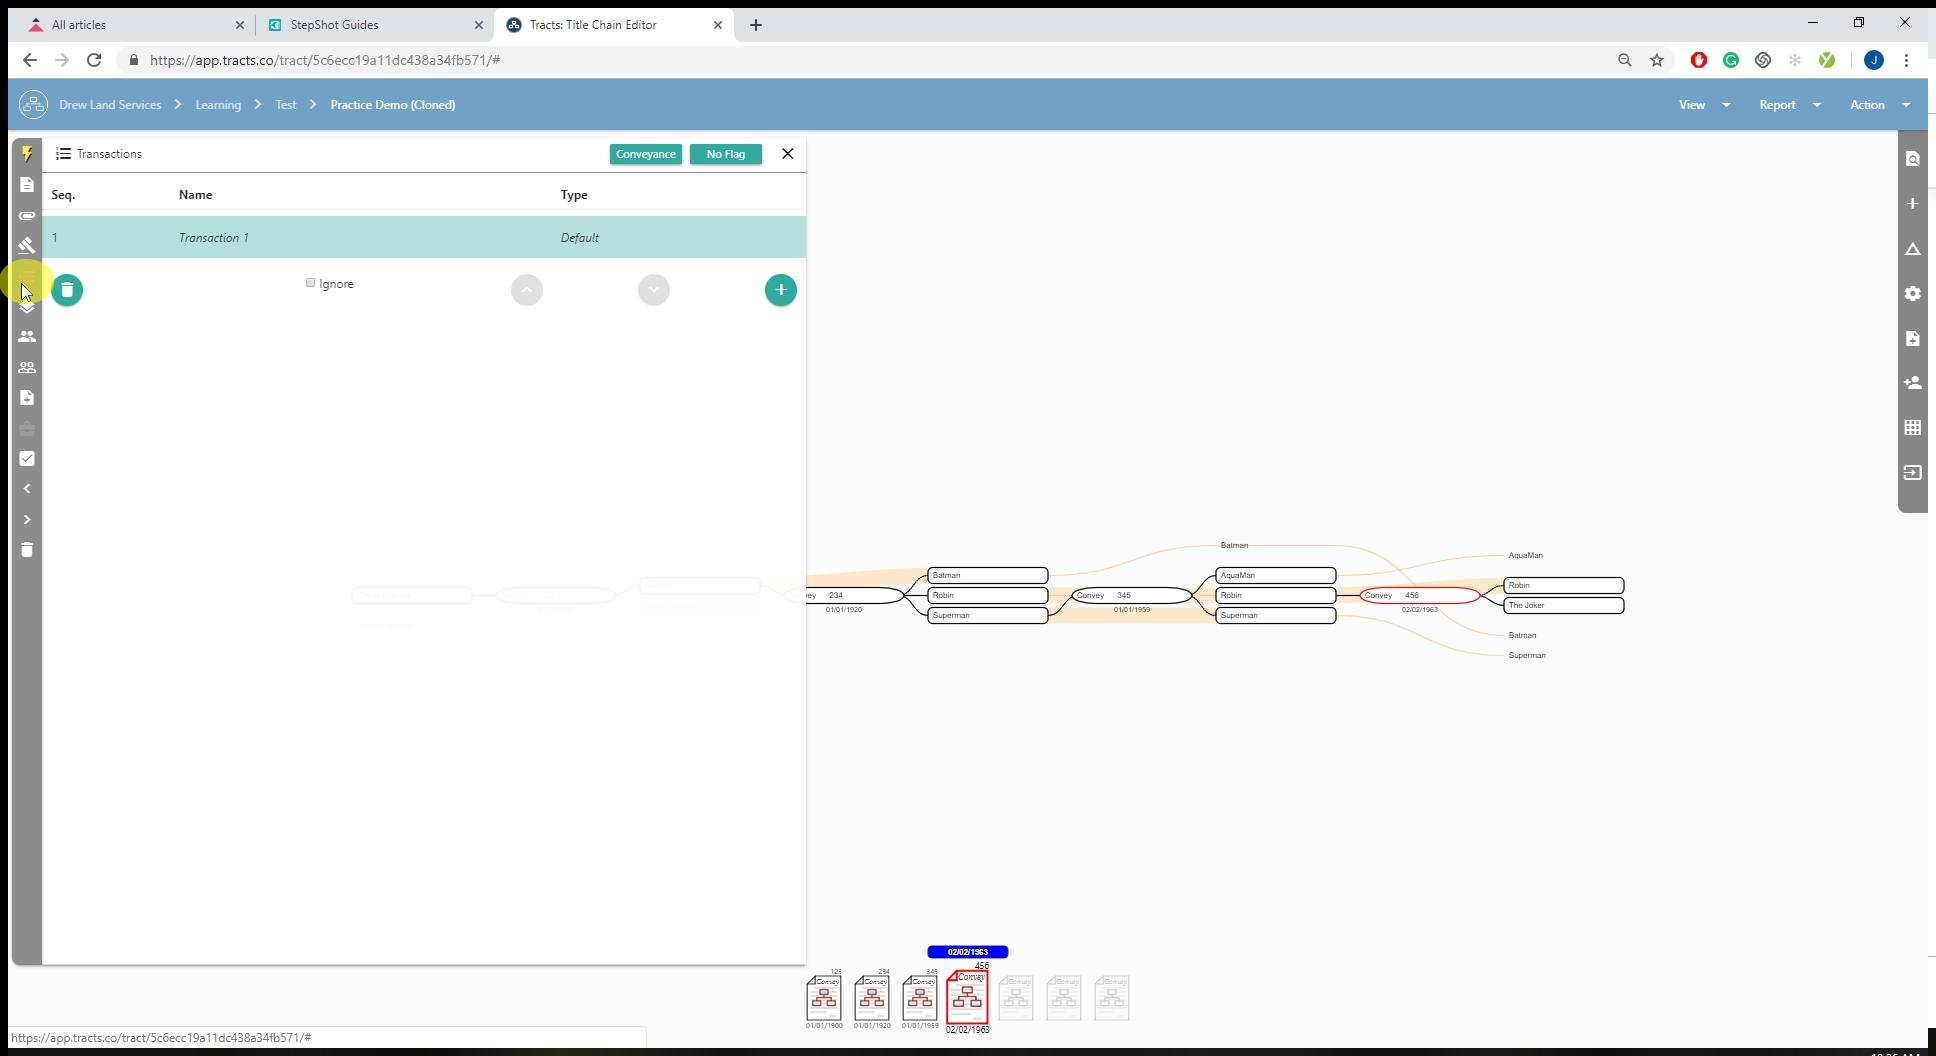
Transactions
This tab allows you to create multiple transactions inside of one document.
Subtracts & Depth
Here you will be able to see the different subtracts and depths that are assigned to the document you are working on. You can select the turquoise plus button to assign the subtract or depth to the notecard.

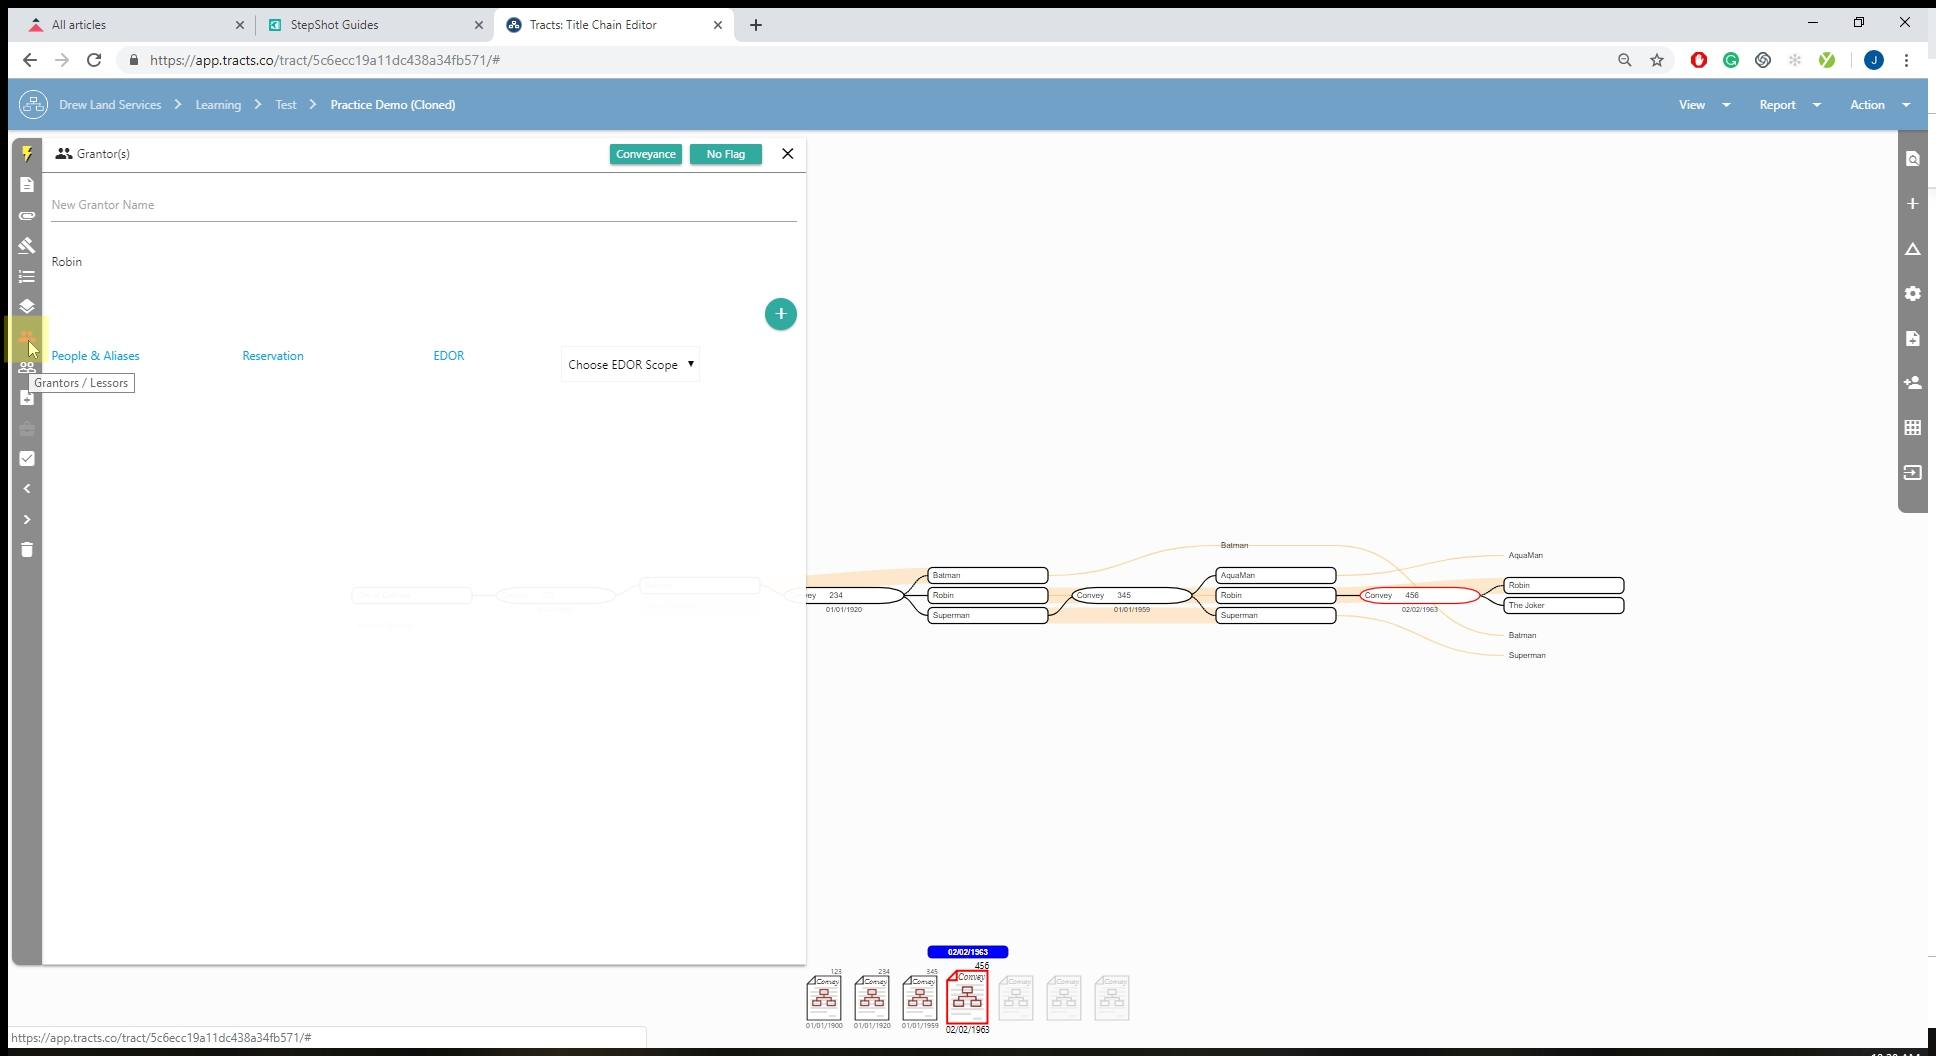
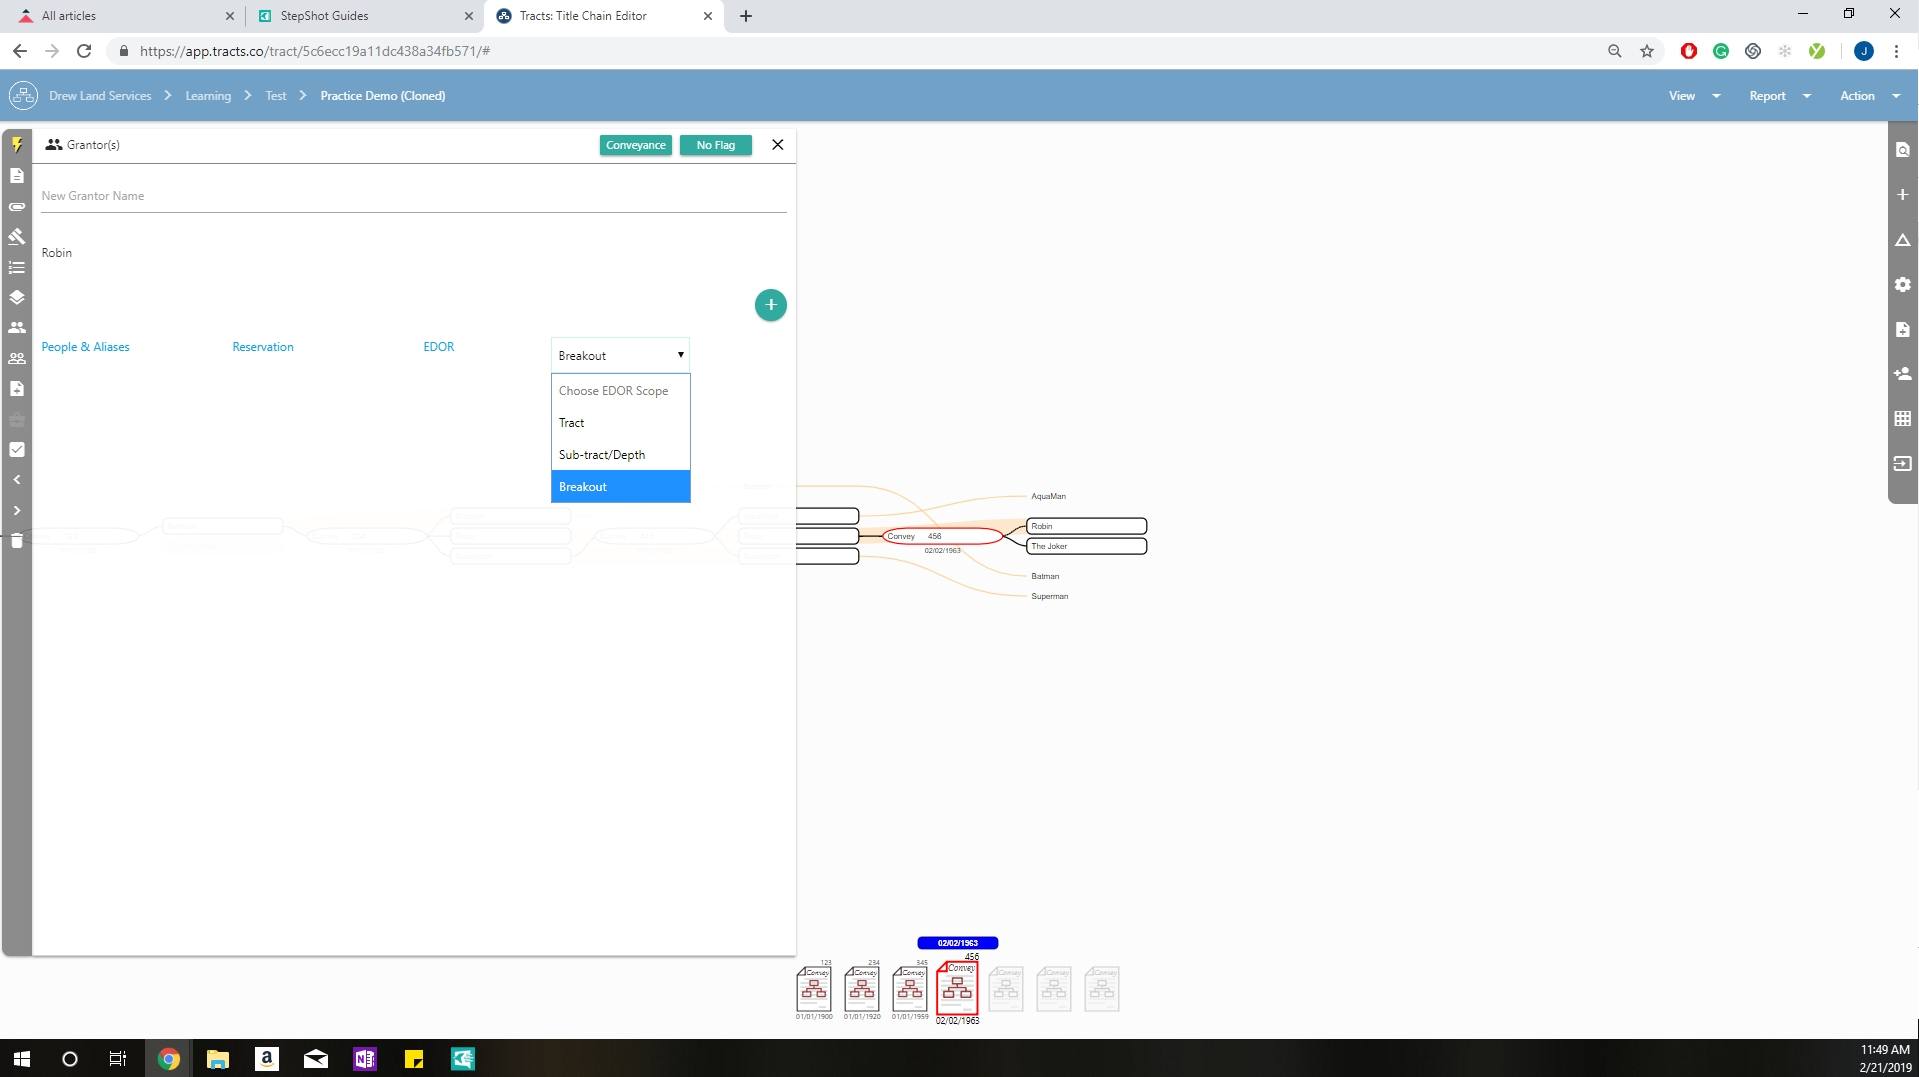
Grantors/Lessors
Under this tab, you can find the list of Grantors/Lessors for the document in the notecard. You have the option to navigate to the People & Alias Tool, grant a Reservation, and assign EDOR with the EDOR scope. When selecting “Reservation” you will be taken to the Grantee tab to create the reservation.
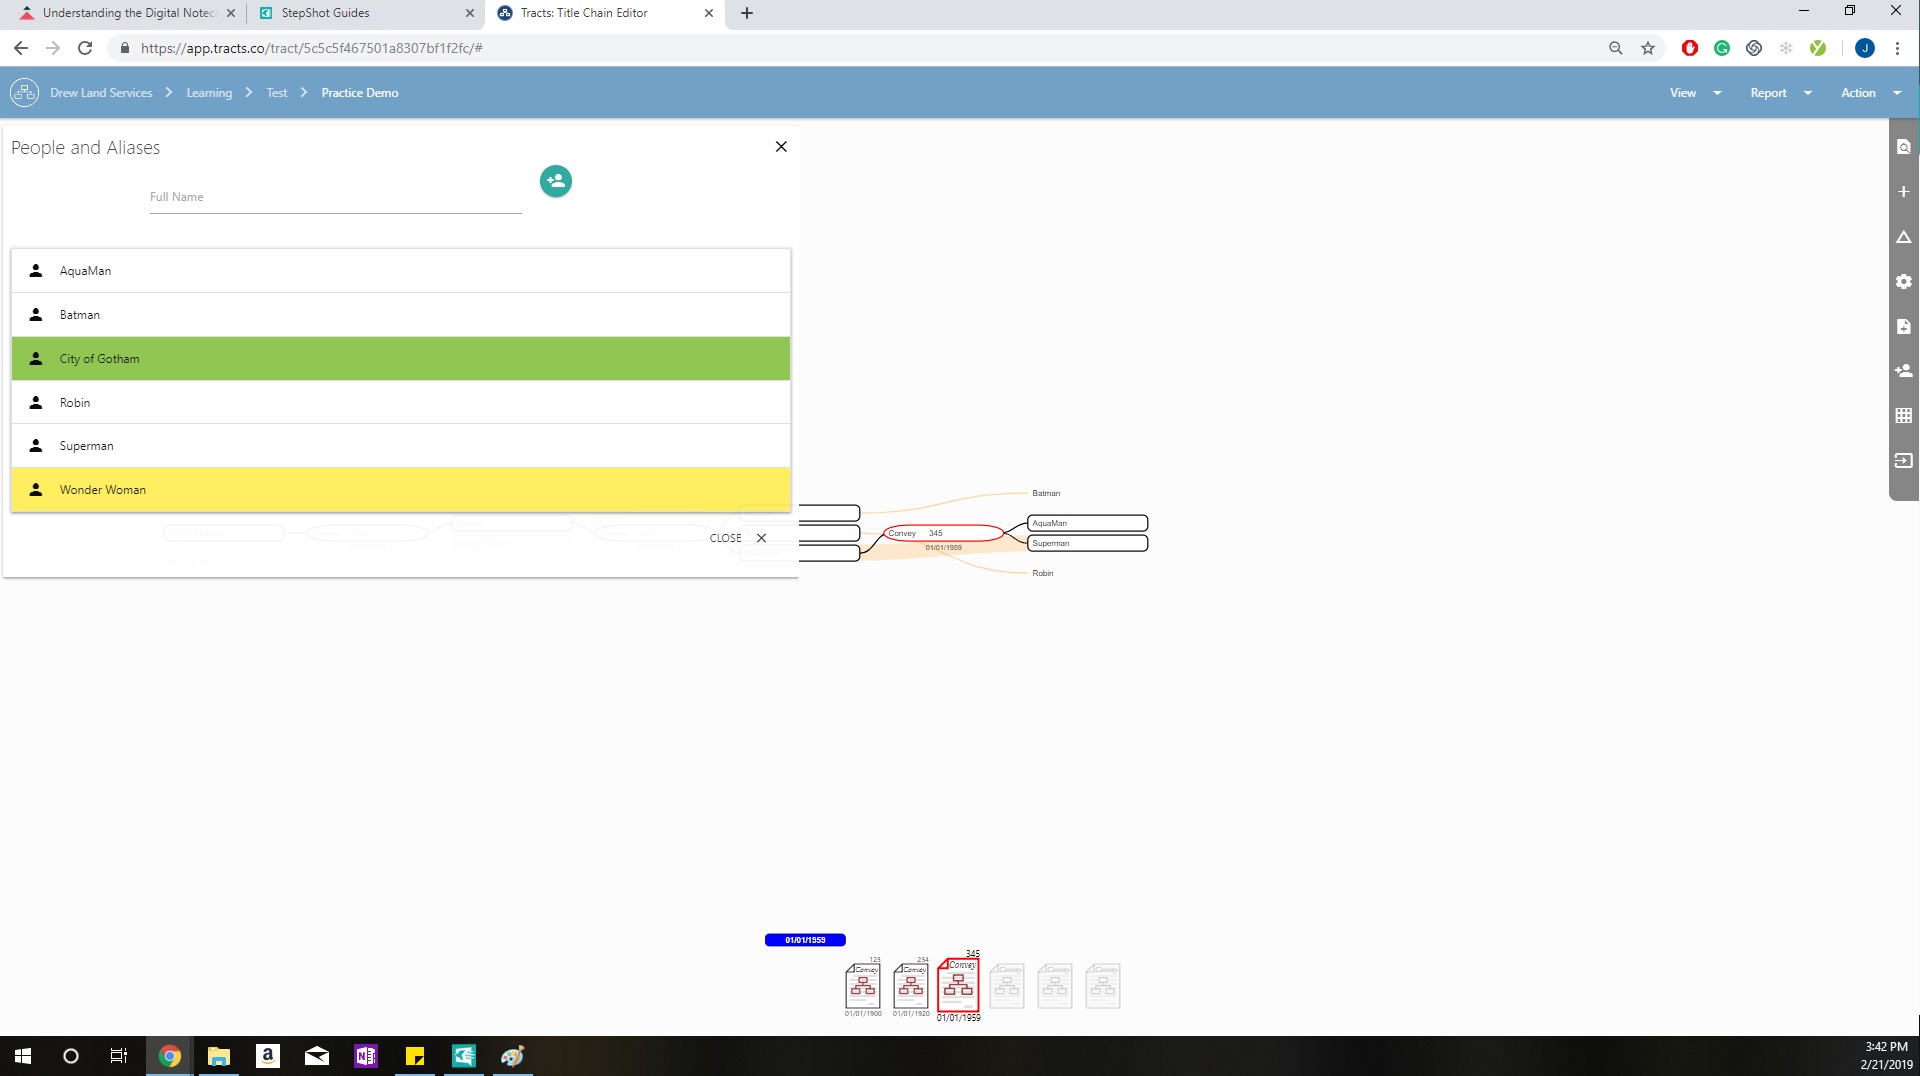
People & Alias Tool
EDOR Scope Options
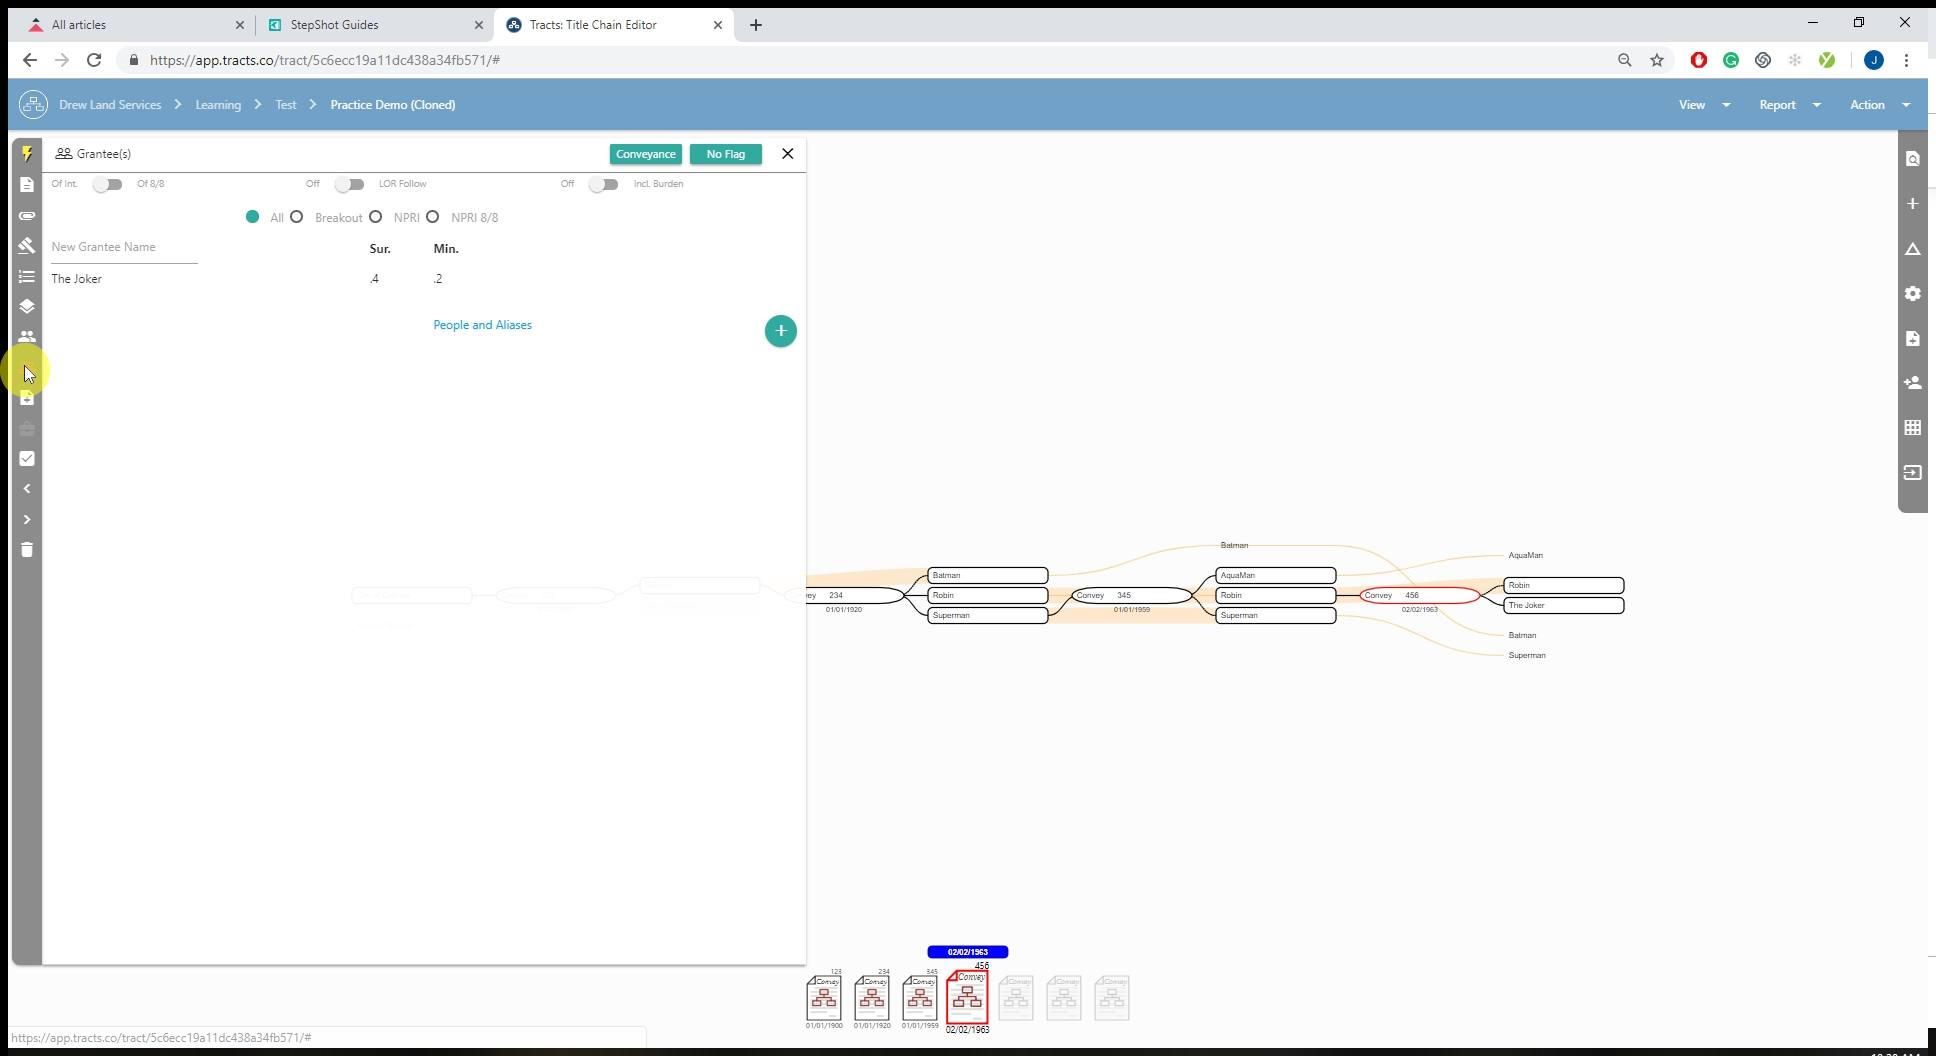
Grantees/Lessees
Under this tab, you have the ability to create a reservation from the Grantor tab by adding the original Grantor’s name as a Grantee. You can toggle switches along the top to indicate interest type, LOR Follow, and Lease Burden Inclusion. The Grantee tab can also be a pathway to accessing the People & Alias tool.
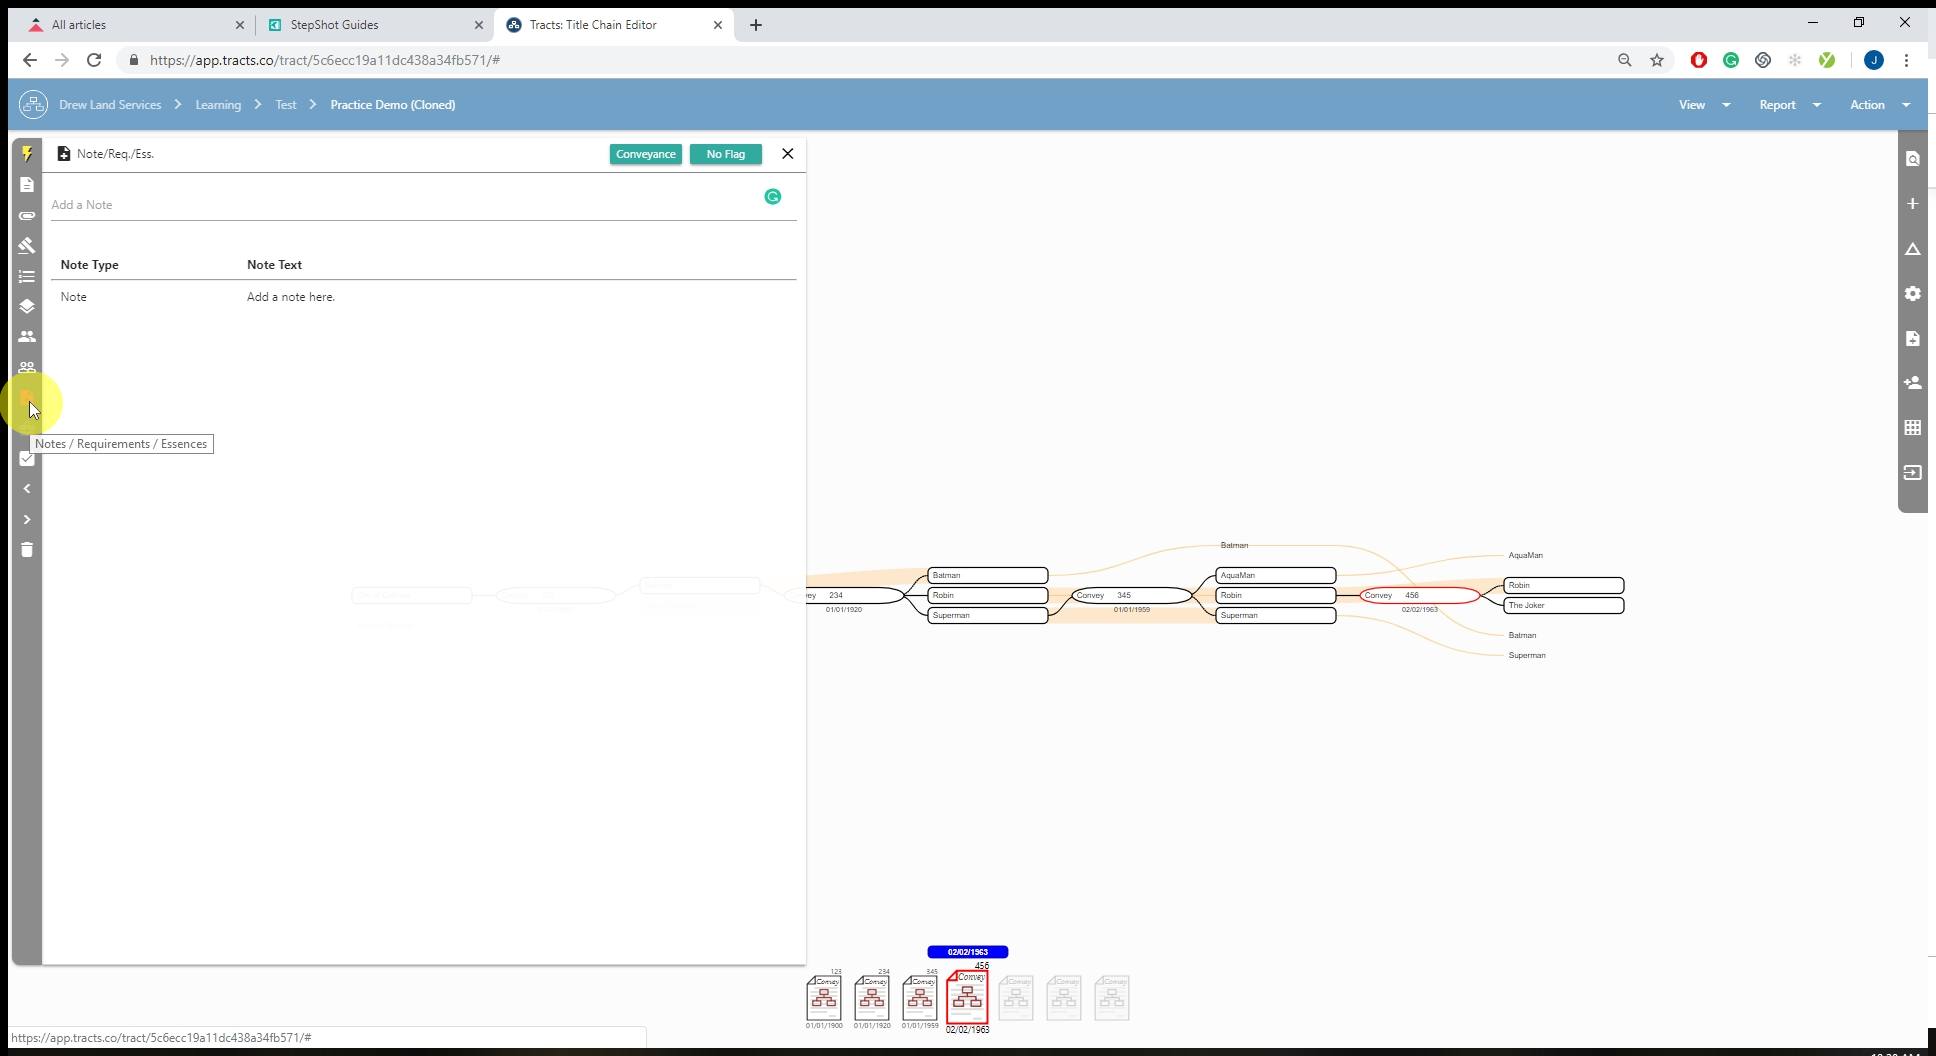
Notes/Requirements/Essences
In this tab, you can create and add different notes you think are worth adding into the system about the document you are working on. Everyone with access to the AOI can read these notes and they will appear in the runsheet.
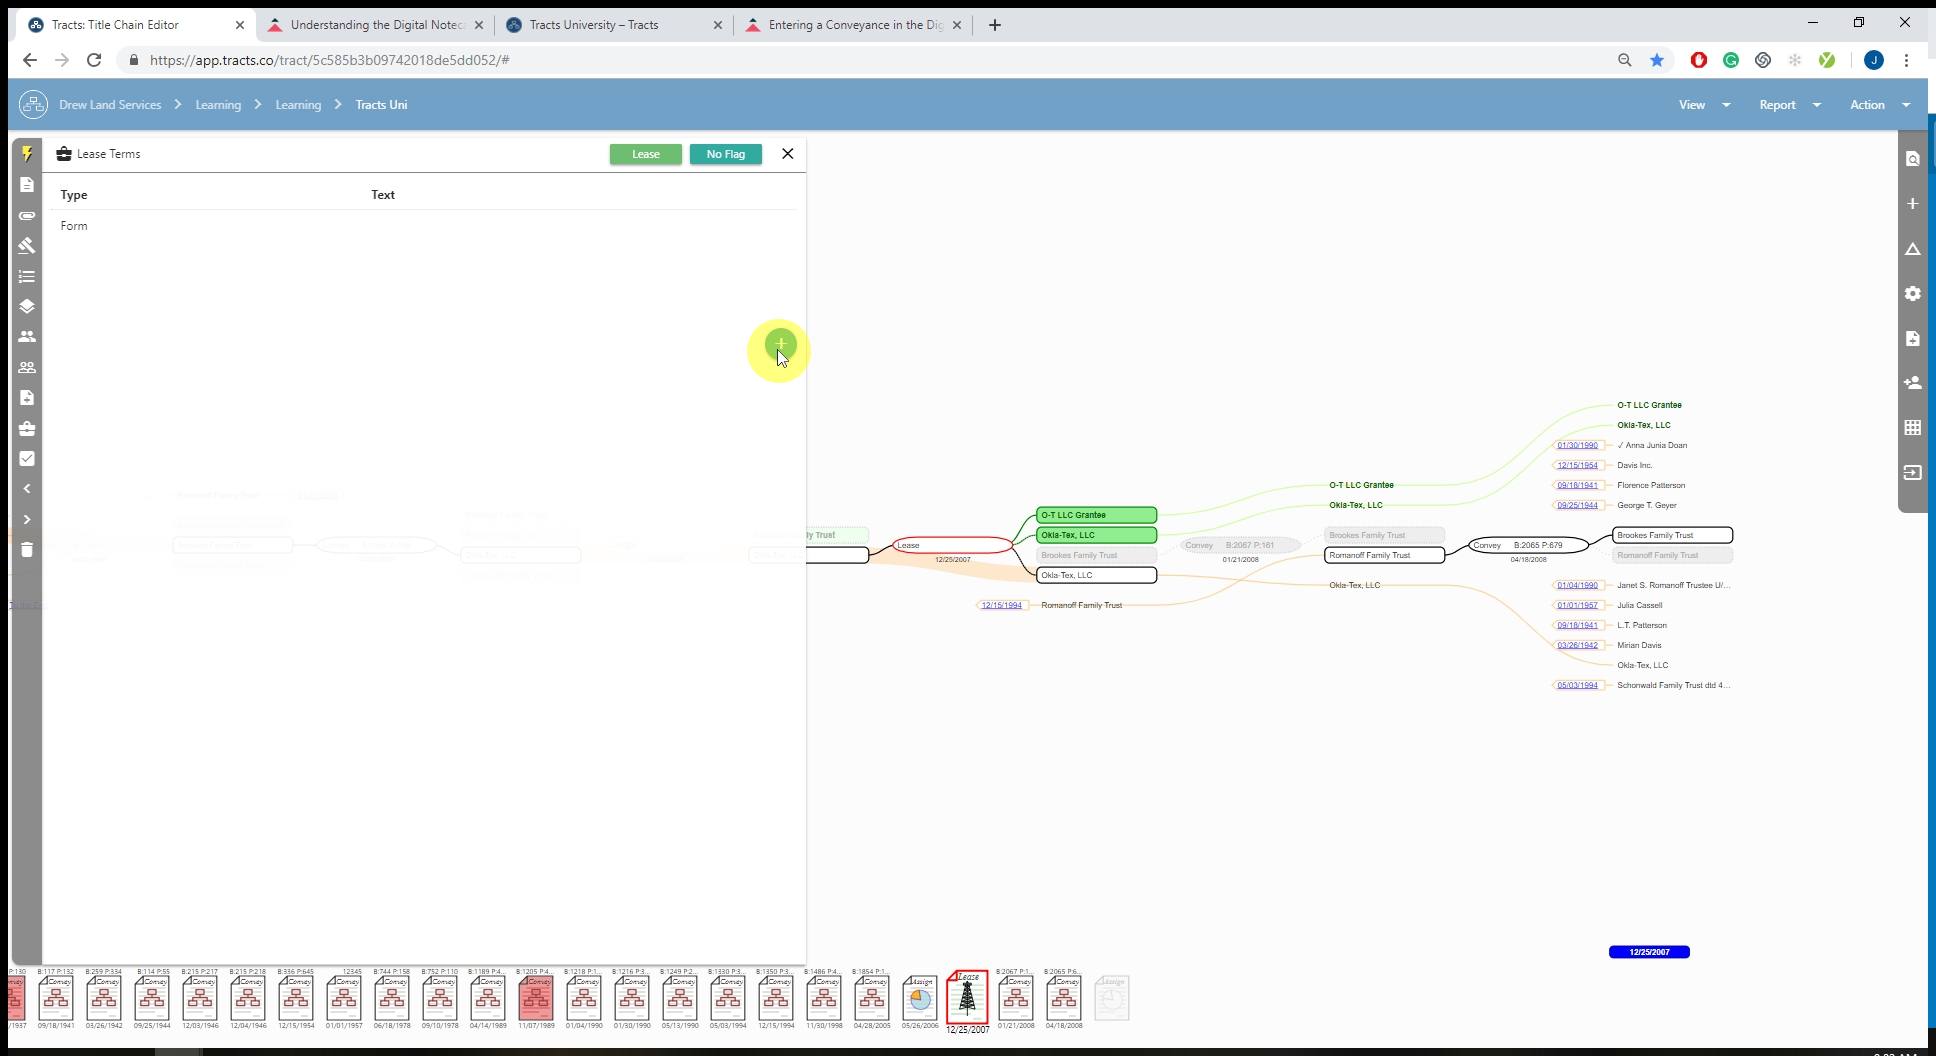
Lease Terms
Here you can enter pertinent information about Lease Terms.
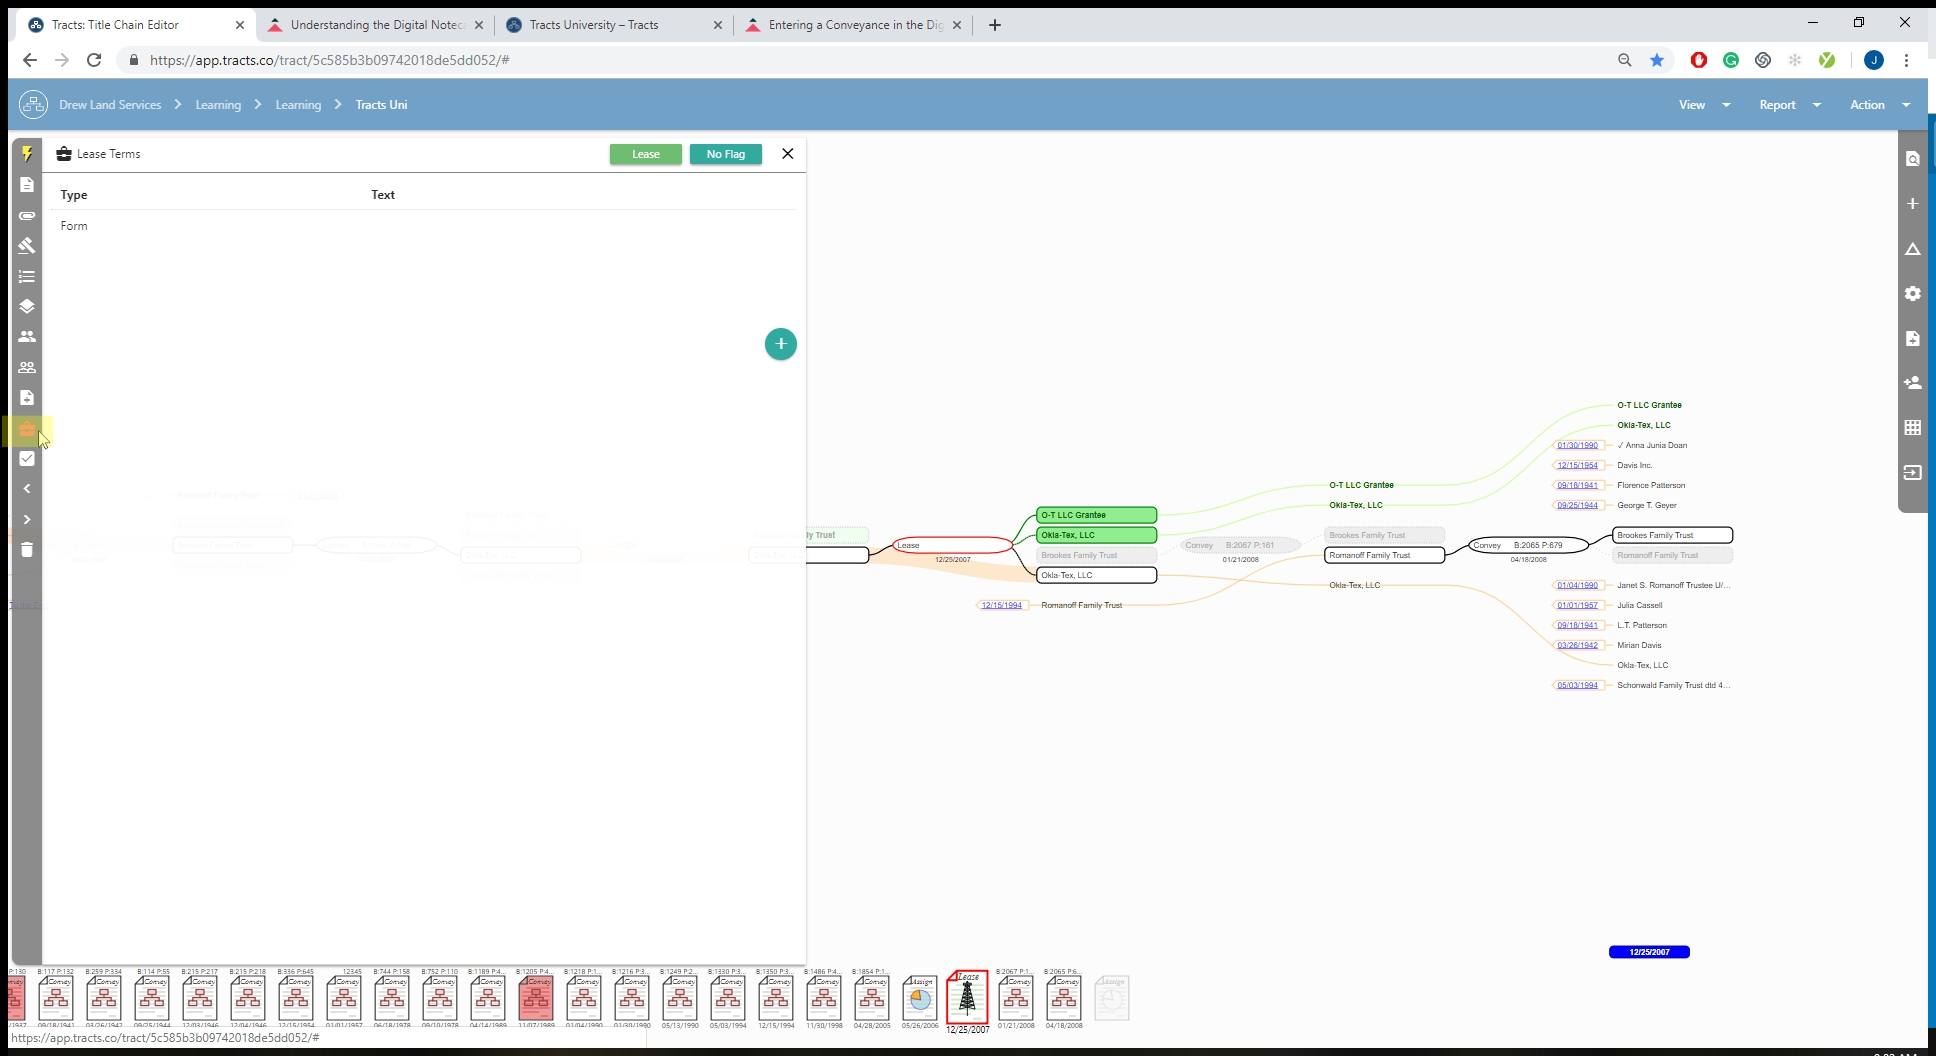
Add a Lease Term
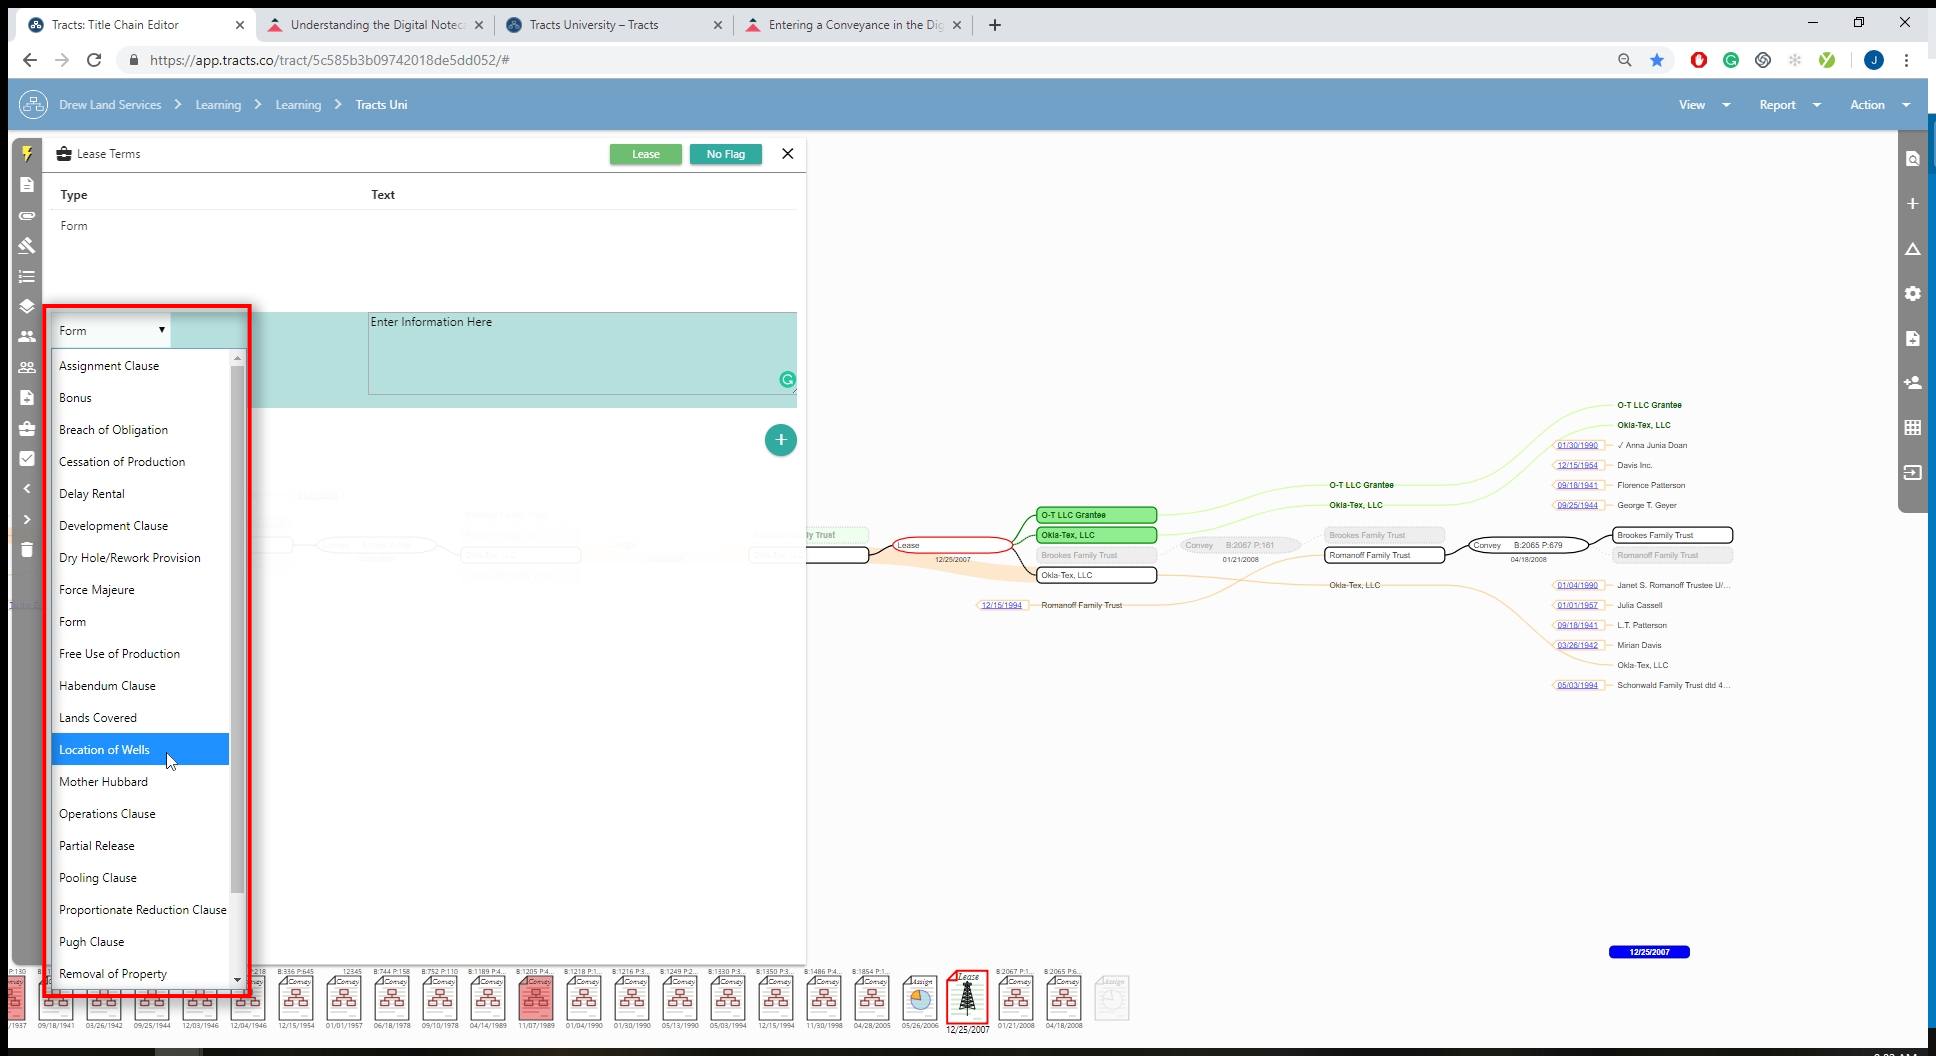
Select Form Type
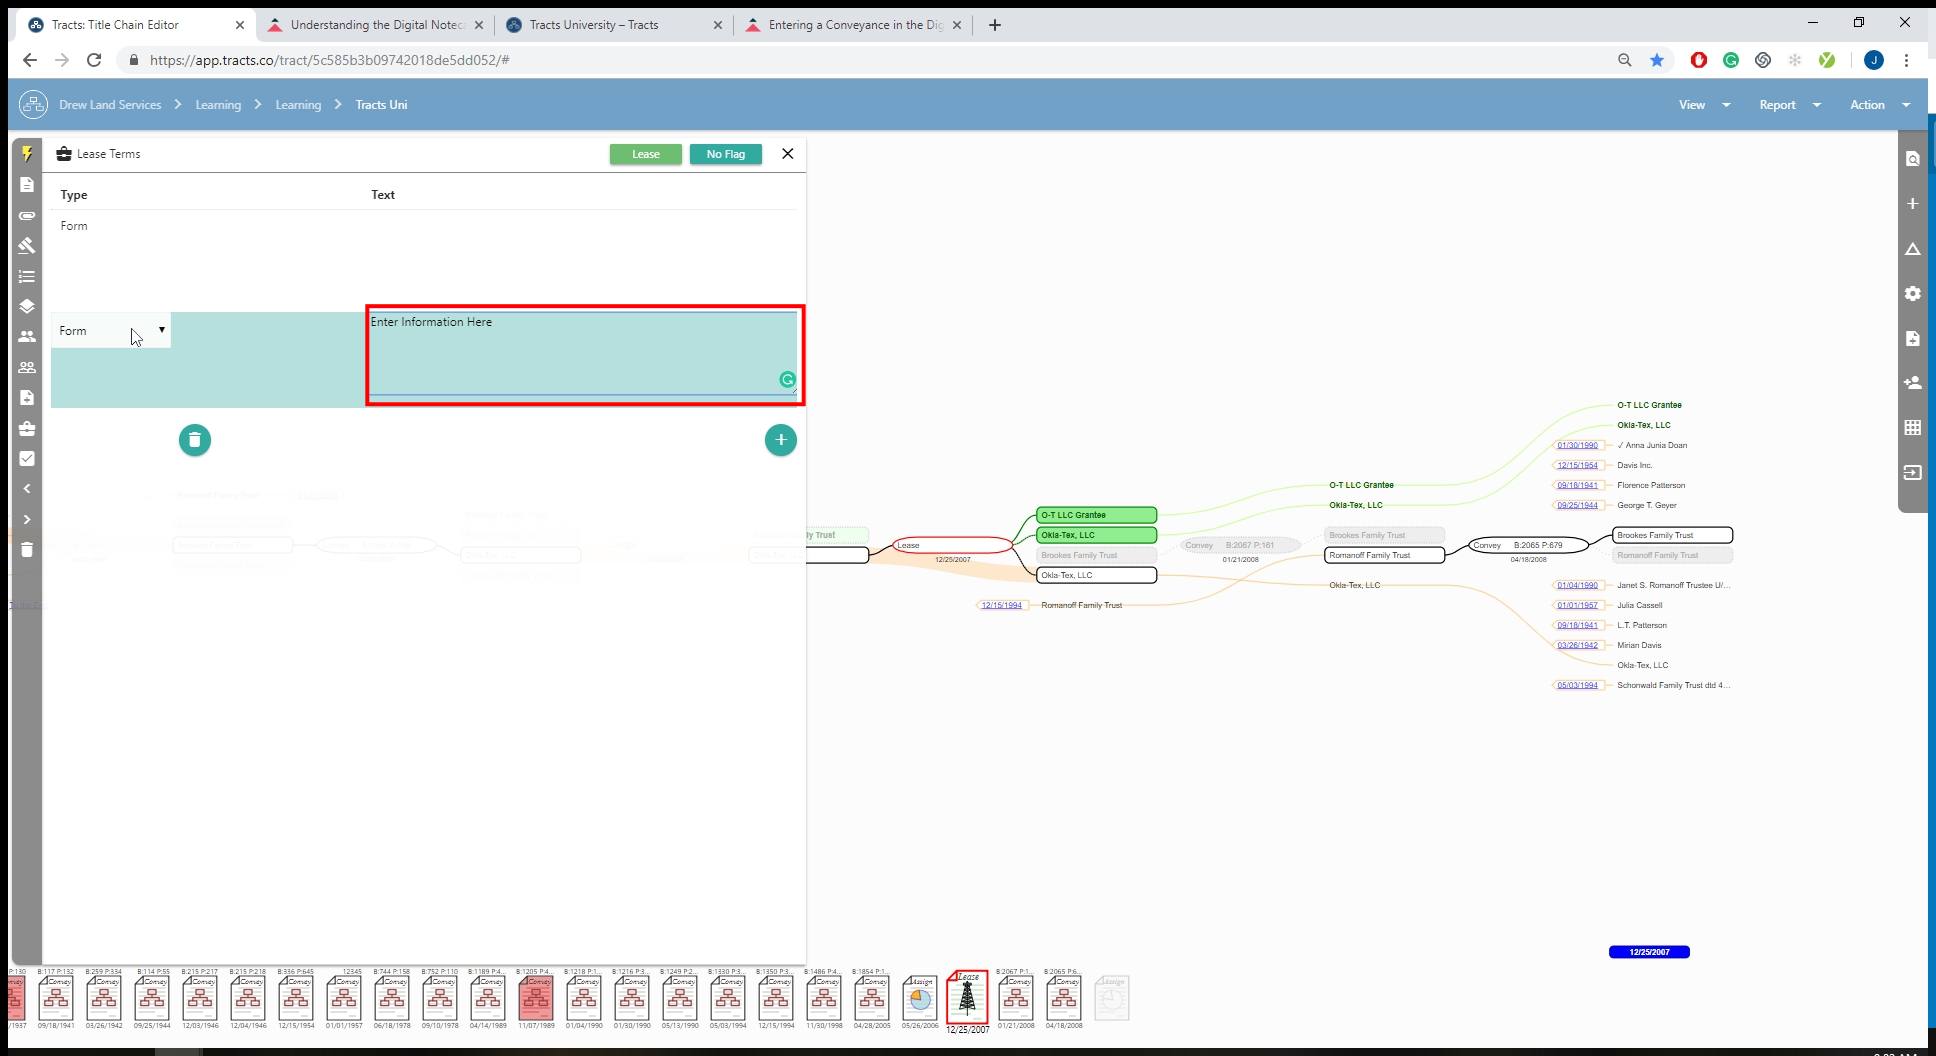
Enter Information
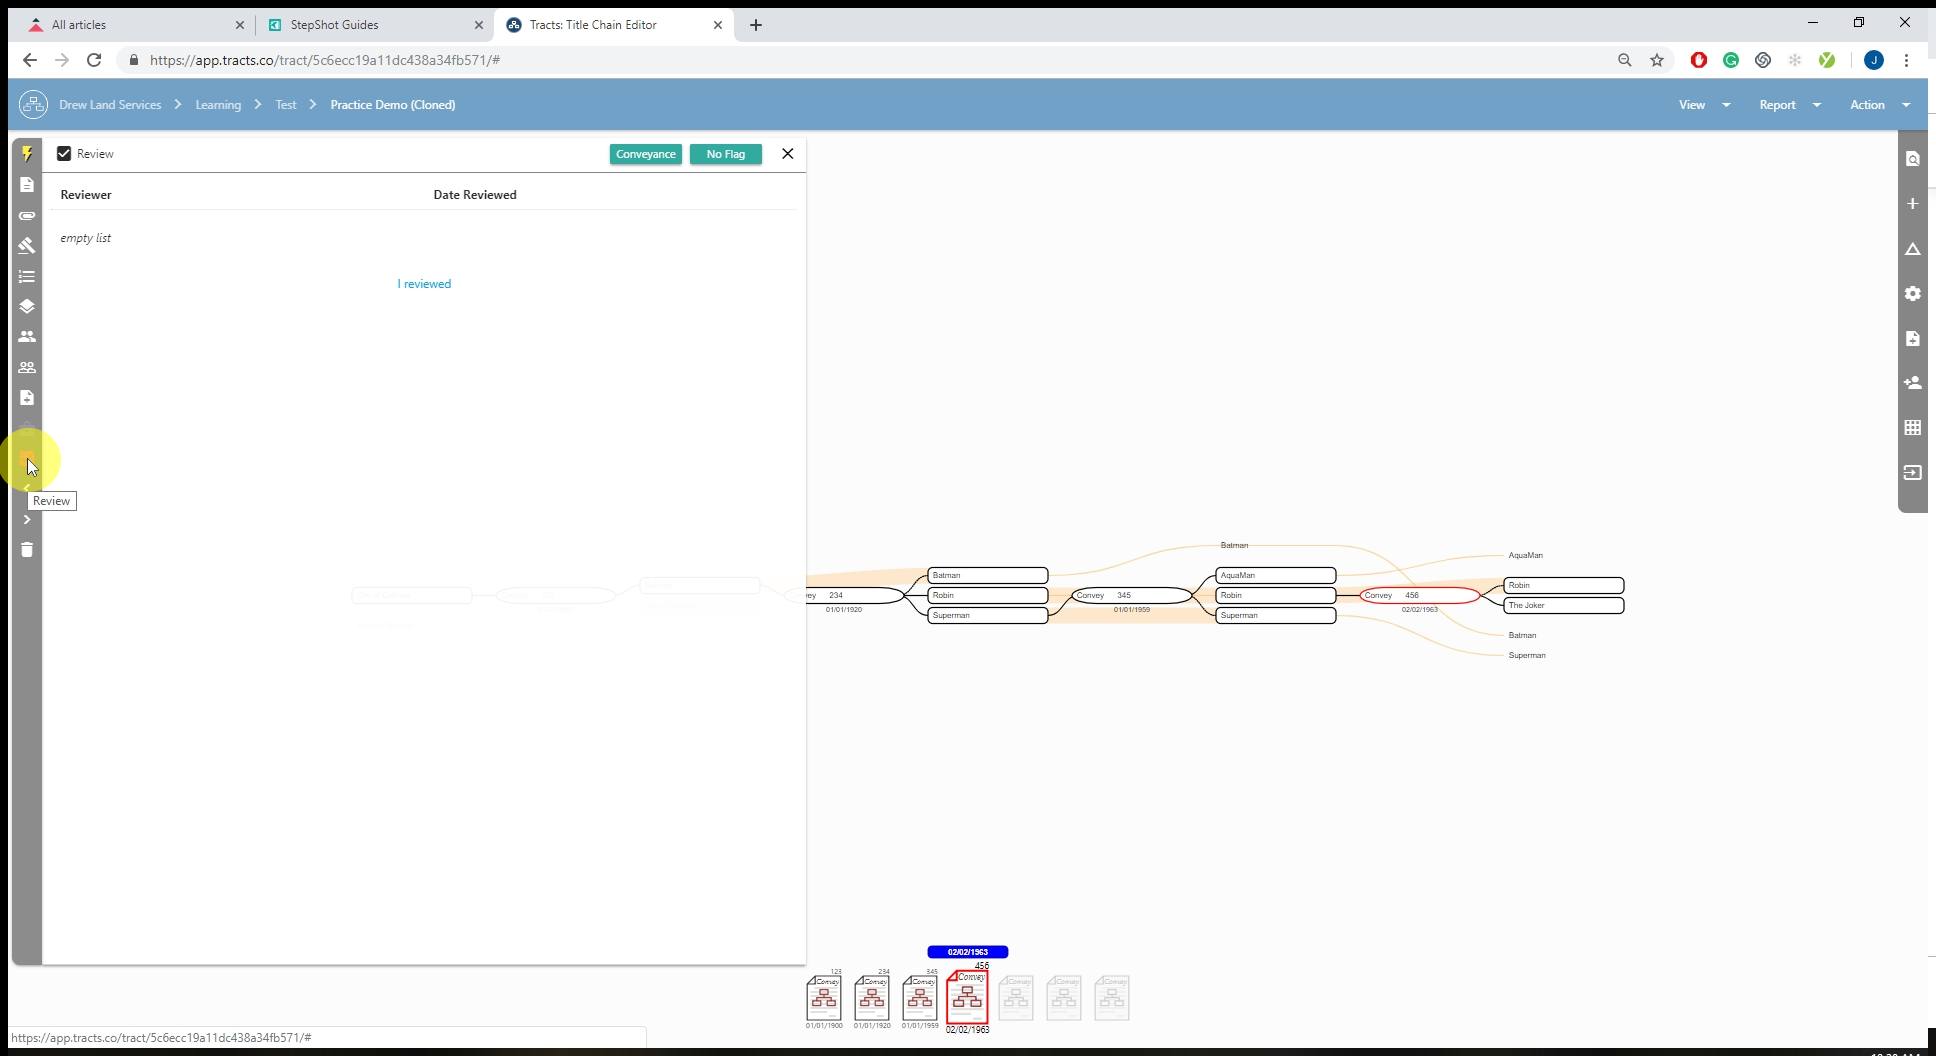
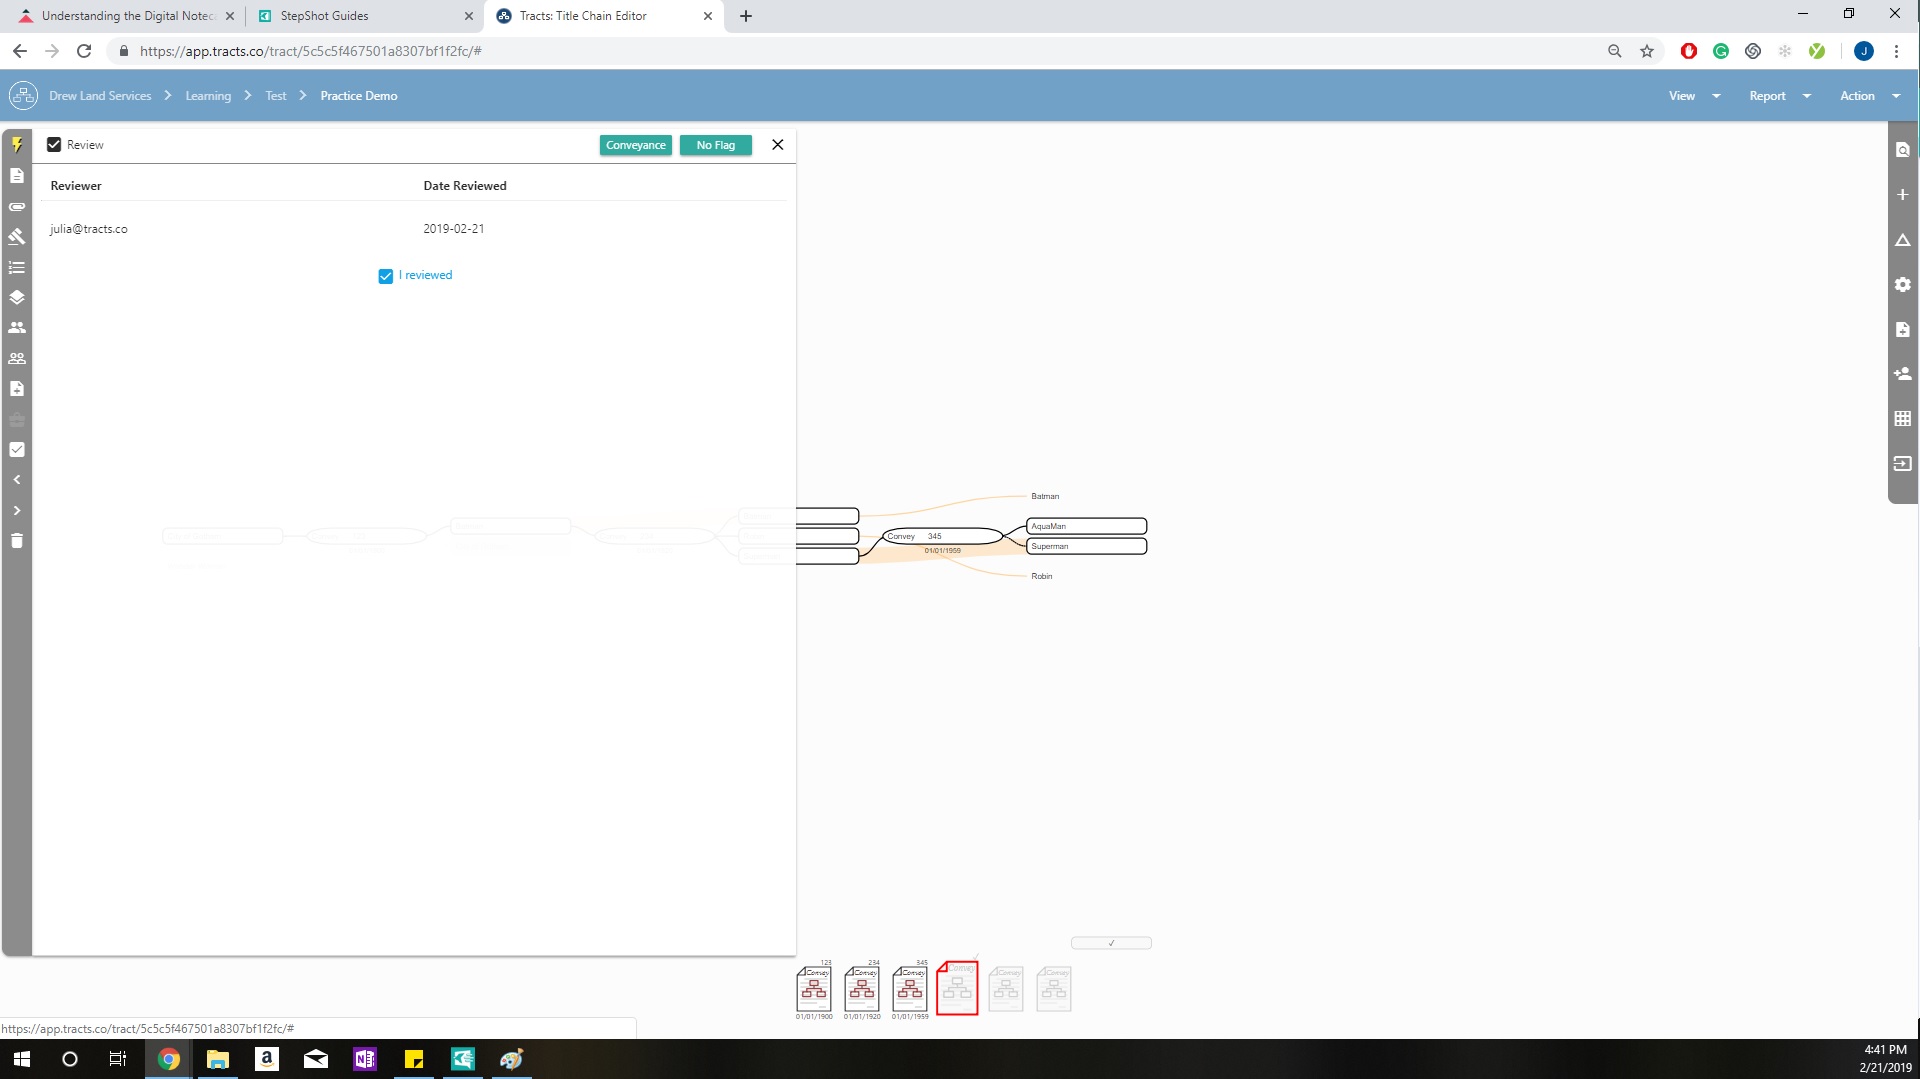
Review
Here you can see the email and date of the party who reviewed this document in the AOI. Once reviewed, the document will show a checkmark on top of the document icon at the bottom of your screen.
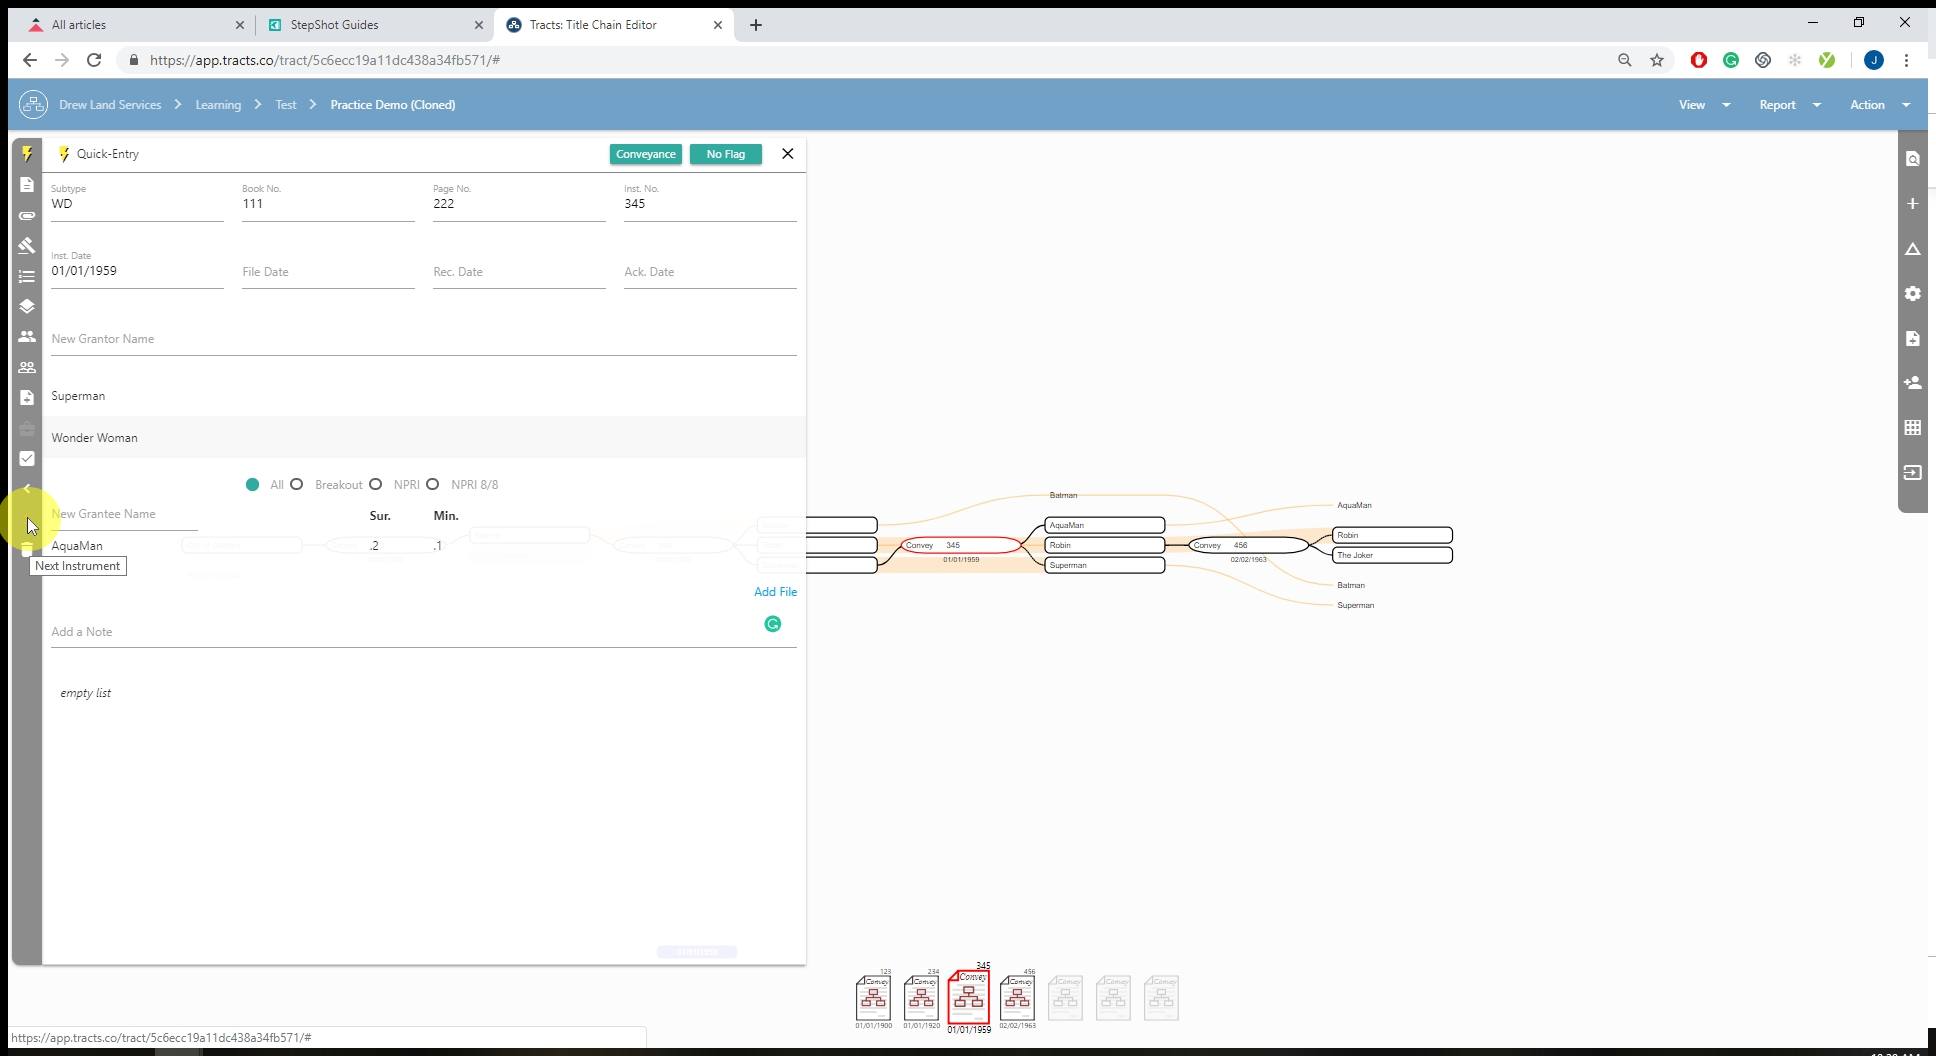
Previous/Next Instrument Navigation
Using the two arrow icons, you can navigate through notecards in the chain.
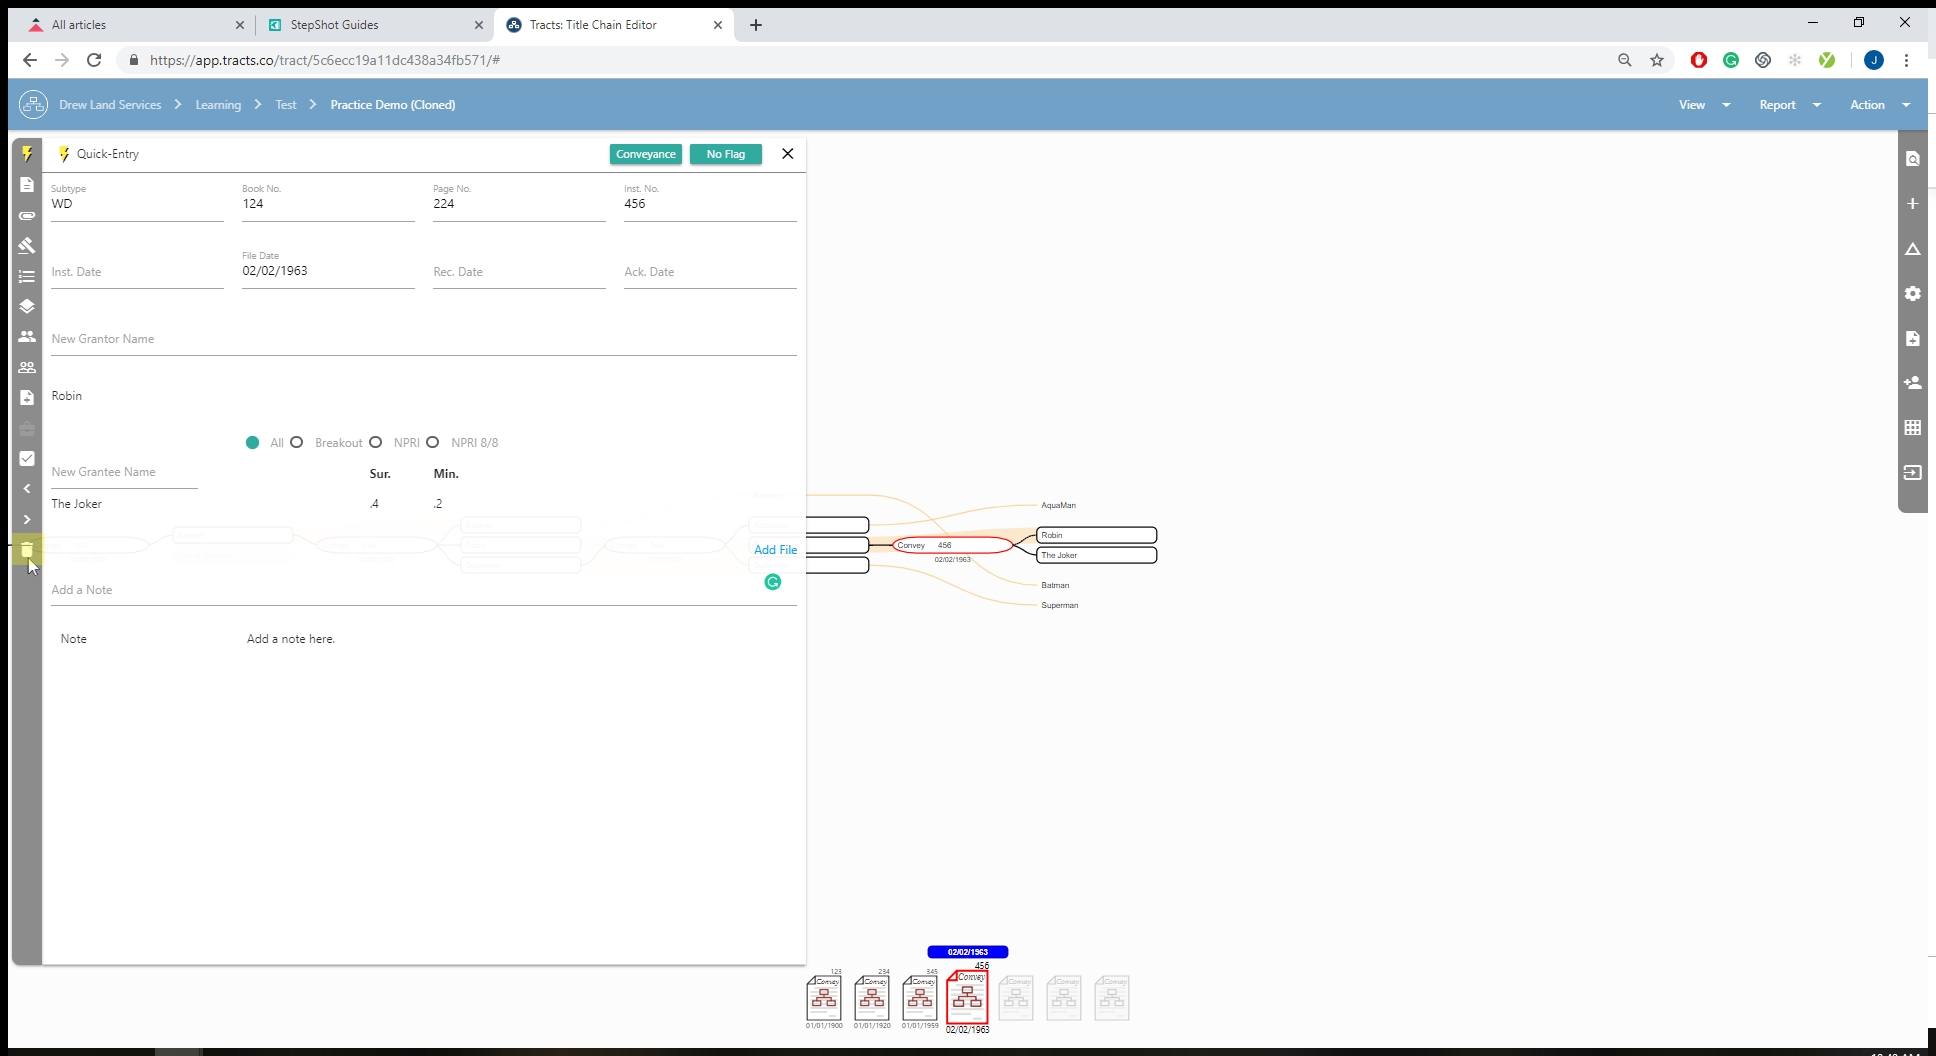
Deletion
Double-click the trashcan icon to confirm the deletion.
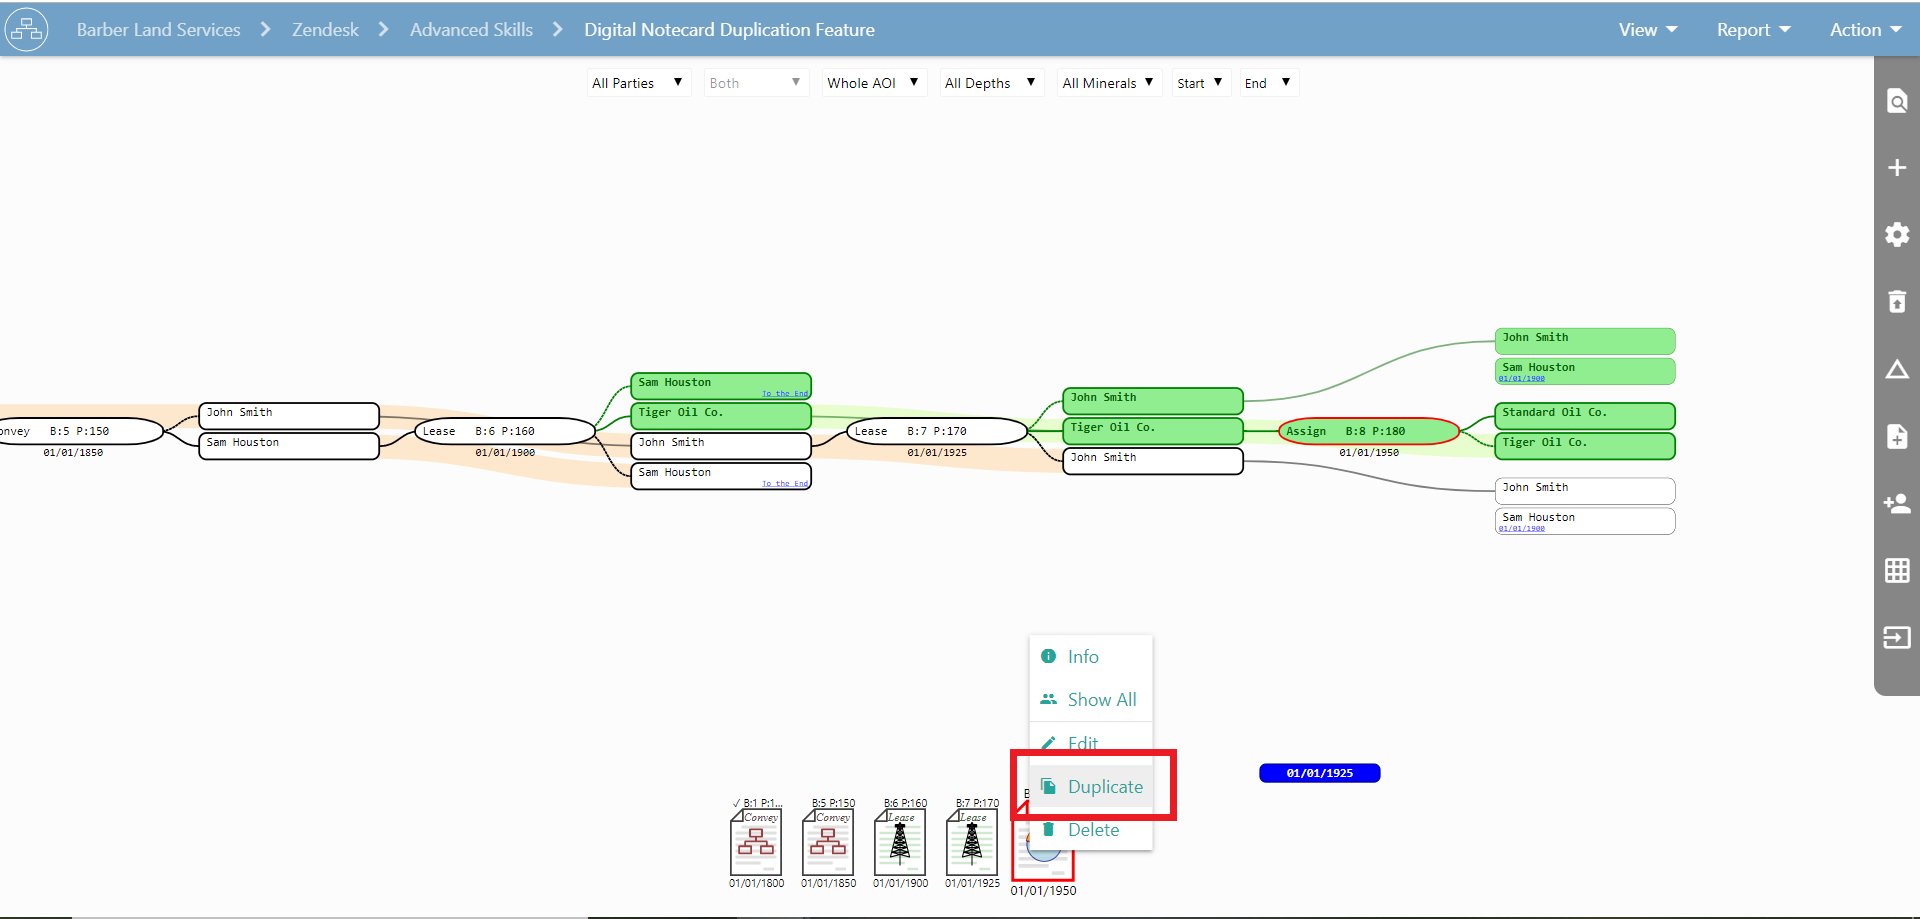
Notecard Duplication
If you’re having to enter multiple similar notecards into Tracts you can save yourself some time by duplicating one notecard and changing the necessary fields instead of completely re-entering information you already have inputted. Just right-click on the document icon along the bottom of the screen you would like to duplicate and choose the duplicate option when the menu appears.